vROPs 6.1 – How to monitor Websites, URLs, IP Addresses, and Ports using EPOPs
Posted in vROPs, vROPS - EPOPs
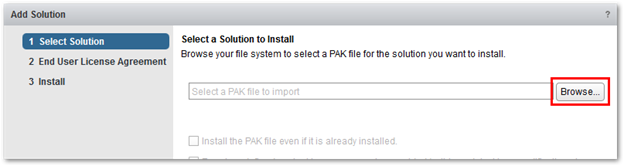
The following guide will show you how to monitor a website, monitor IP addresses and URLS, and monitor a URL with ports using vRealize Operations Manager EPOPs agent.
How to Monitor a Website
In this example we will monitor a URL remotely. The agent does not need to be installed on the remote site we want to monitor, however a monitoring server that has the agent installed is required.
-
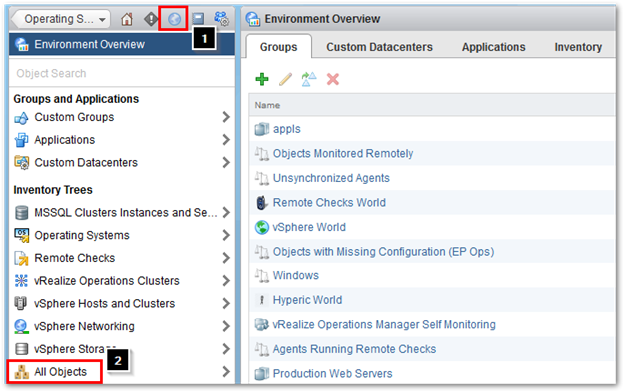
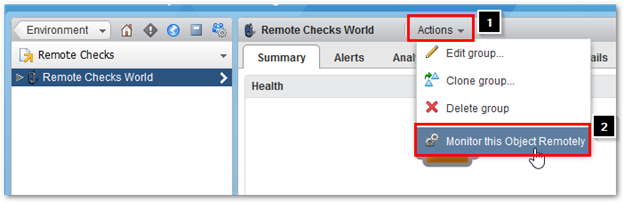
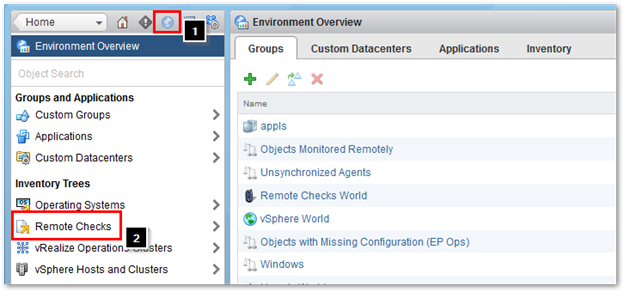
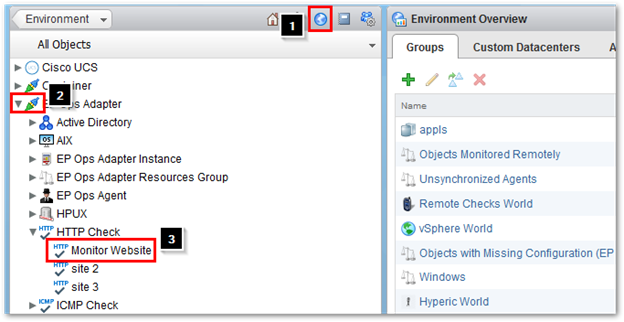
Click on Environment > Remote Checks

-
Select Actions > Monitor this Object Remotely
-
Fill in the following
- Enter a Display Name
- Select the Agent for a monitoring server (this can be different than the server we want to monitor)
- Change the Check Method to HTTP Check
- Type in the URL
-
Click on OK when completed

-
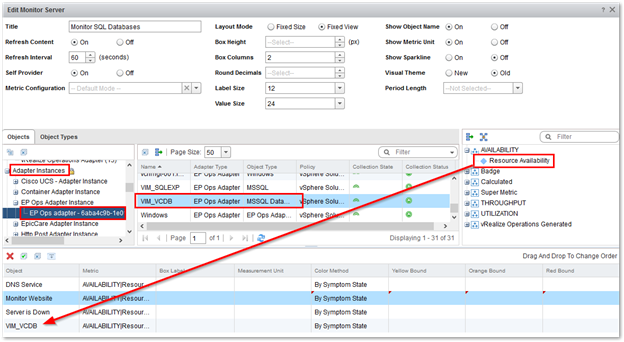
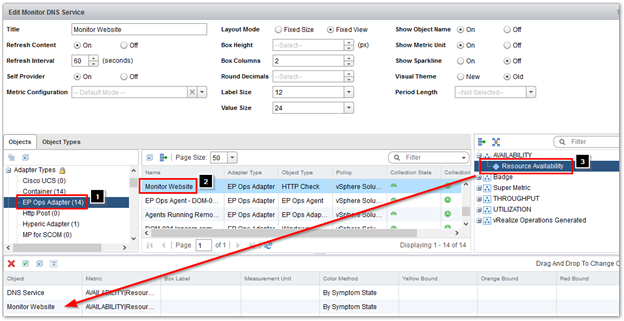
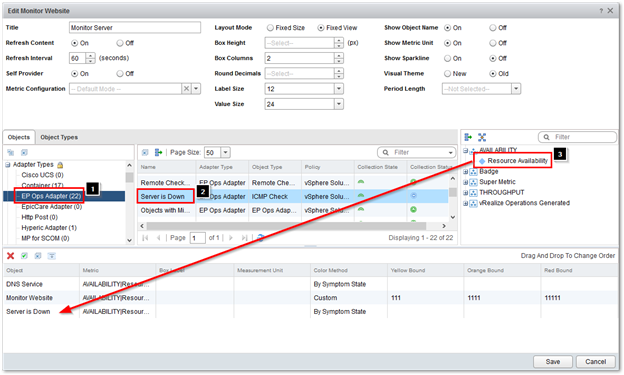
It is now ready to be added to a Scoreboard widget
-
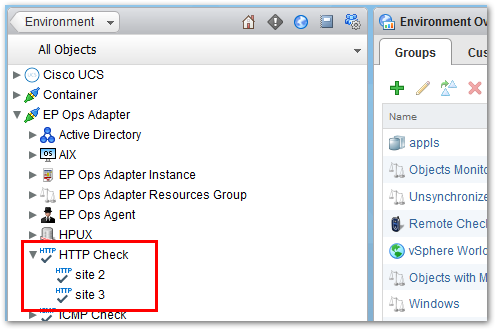
Once configured it should look like the following

How to monitor if a Server is down via ICMP
In this example we will monitor ICMP to check if a Server is down.
-
Click on Environment > Remote Checks

-
Select Actions > Monitor this Object Remotely

-
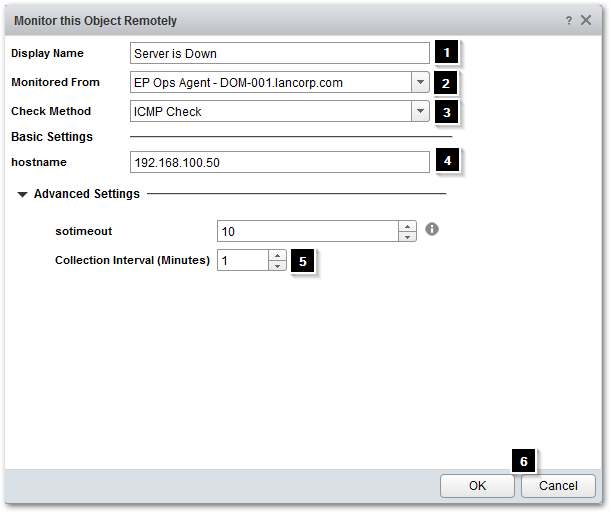
Fill in the following
- Enter a Display Name
- Select the Agent for a monitoring server (this can be different than the server we want to monitor)
- Change the Check Method to ICMP Check
- Type in the Hostname (this is the server we want to monitor, this server must have the EP agent installed)
- Change the Collection Interval to 1 Minute
-
Click on OK when completed
-
It is now ready to be added to a Scoreboard widget
-
Once configured it should look like the following

How to Monitor a URL with a Port using TCP
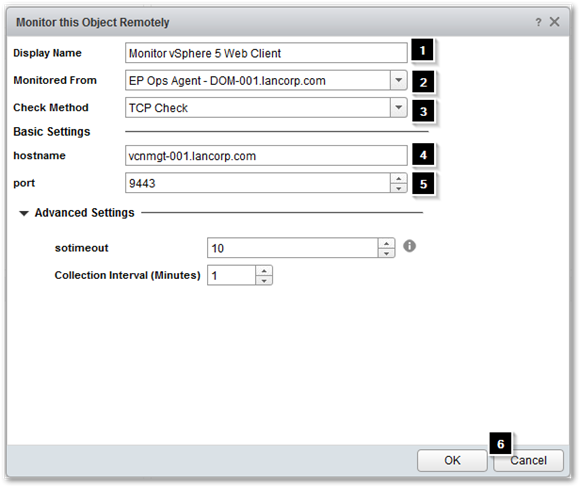
In this example we will monitor the vSphere 5 Web Client that uses port number 9443. The agent does not need to be installed on the remote site we want to monitor, however a monitoring server that has the agent installed is required.
-
Click on Environment > Remote Checks
-
Select Actions > Monitor this Object Remotely

-
Fill in the following
- Enter a Display Name
- Select a server with an Agent installed (does not have to be the same server)
- Change the Check Method to TCP Check
- Type in the Hostname
- Type in the Port Number
- Click on OK when completed
- It is now ready to be added to a Scoreboard widget


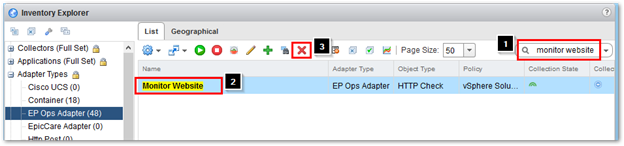
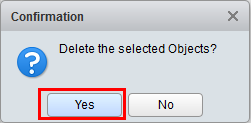
 to delete the object permanently