The following guide is an updated guide for vRealize Operations Manager 6.6 and above. This guide will show you how to lock down Group accounts to see only dashboards that we want them to see when they login. This means they won’t see the Alerts, Environment, Home, and Administration pages. The reason why we would want to lock everything down is because giving users access to more than they need will cause more questions than answers. For example, the Storage Team should only see storage dashboards while the Monitoring Team (NOC) should only see monitoring dashboards when they login. This guide is unique in that it also shows you how to allow the user group to login remotely, view custom groups, and to be able to access the View widget as well.
-
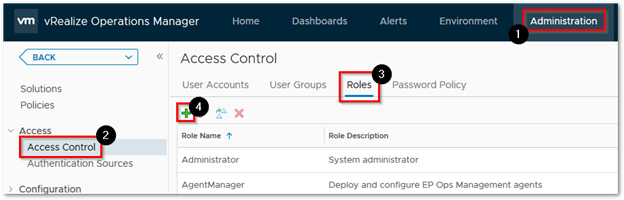
Click on Administration > Access Control > Roles à + Sign
-
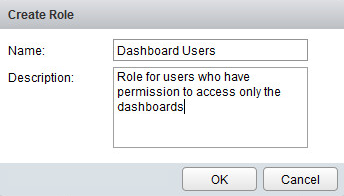
Provide a Name and Description and click on OK
-
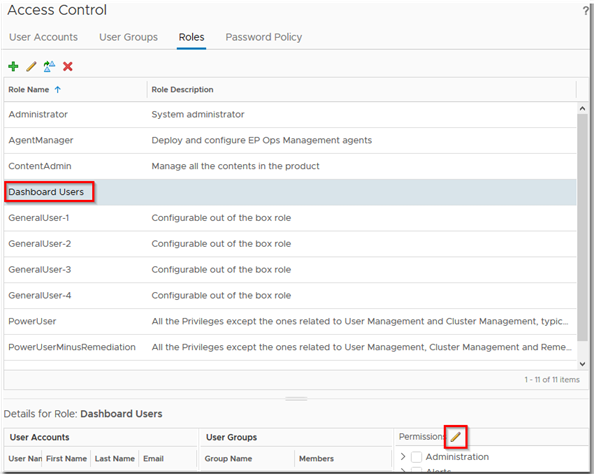
Configure Permissions
- Select the Role we created earlier
-
Click on the Pencil Icon next to Permissions
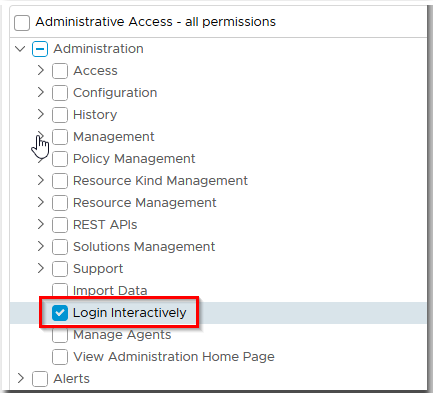
- Expand Administration and make sure only Login Interactively is checked. This allows the user to login to vROPS remotely.
-
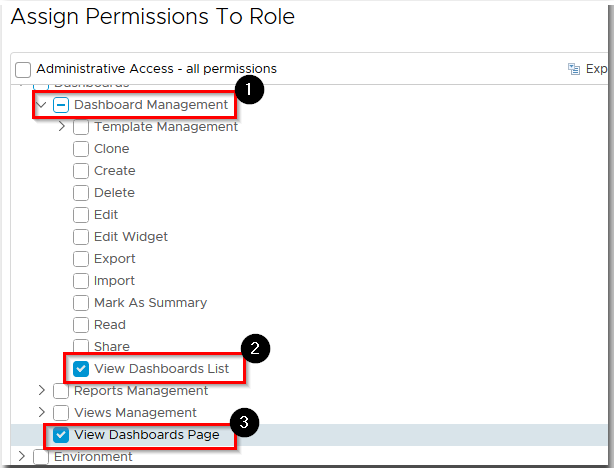
Expand Dashboard > Dashboard Management and check the View Dashboard List box and View Dashboard Page. This allows a user to view Dashboards.
-
Expand Views Management and check the Render box. This allows a user to view the View widget. If this is not checked you will get an Internal Server Error on the view widget.

-
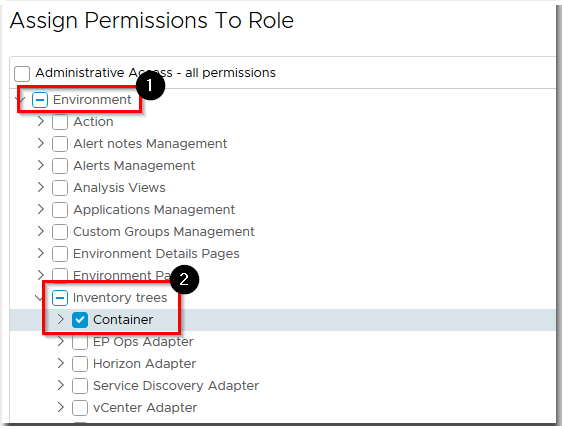
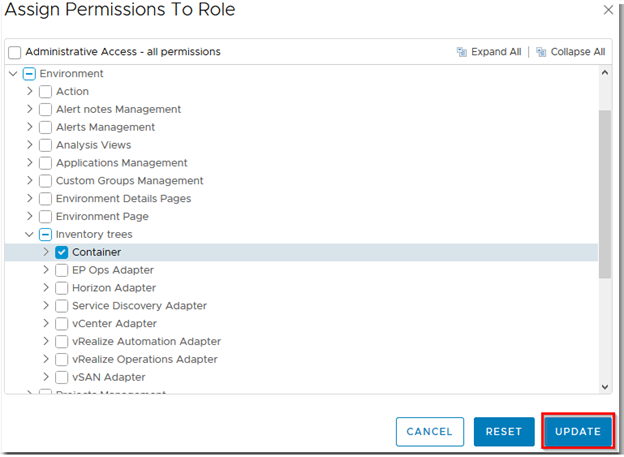
Expand Environment > Inventory Trees and check Container. This allows your users to view custom groups (just in case you are using them).
-
Click on Update to save the settings
- Now we need to assign a User Group to our role. Click on User Groups tab and select the group we want to assign to the role and click on the
 icon
icon 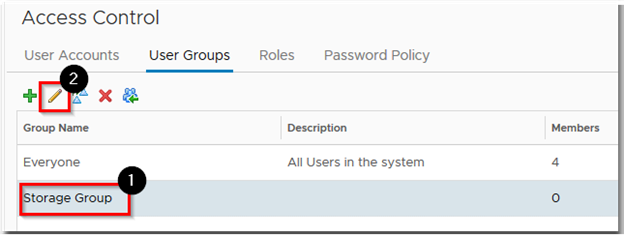
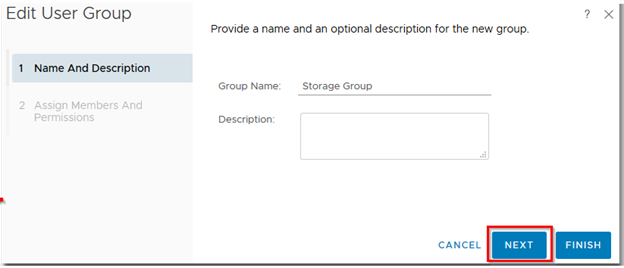
-
Click on Next
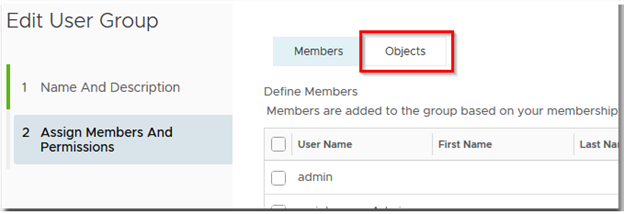
-
Click on Objects
-
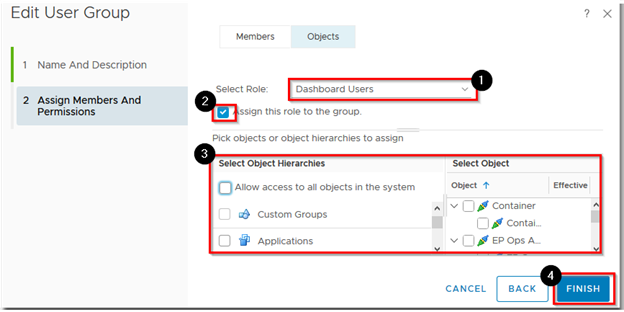
Configure the following
- Change Select Role to Dashboard Users
- Check the box Assign this role to this group
- Select the objects you want to allow the User Group to have access to
- Click on Finish
Sharing out Dashboard
The Next steps are we need to select specific dashboards to share out to our Groups
-
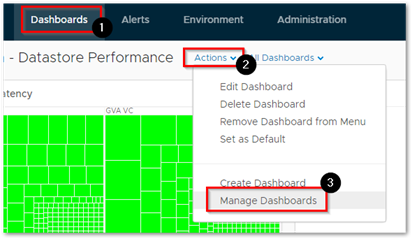
Go to Dashboards à Actions à Manage Dashboards
-
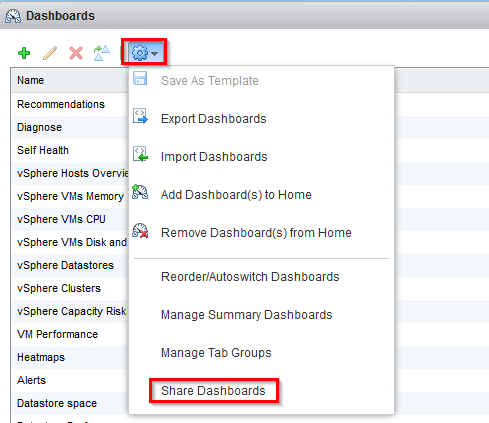
Click on Share Dashboards
-
Select the dashboard you want to share out and drag it to the group you want to share it out to on the left side.
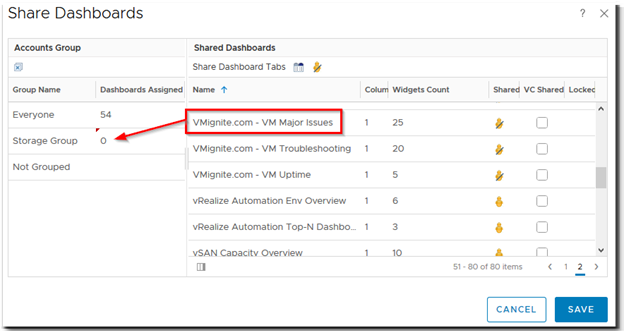
- Click on Save when completed
-
Since we want to allow our user groups to see only specific dashboards we assign to them we will need to clear everything in the Everyone group to prevent conflicts. If any dashboard is assigned in the Everyone group, all groups will see those dashboards by default! Note that every time you install a new vROPS Adapter it will come with a lot of vendor dashboards that are shared out to everyone by default.
Select Everyone and select all the dashboards on the right side and click on the
 icon.
icon.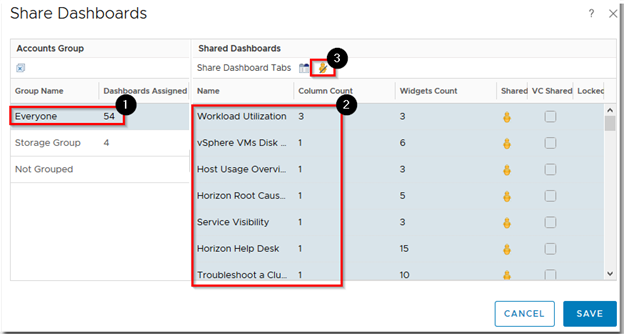
6. Click on Save to update the settings. You should now be able to login as a user in the group and only see dashboards assigned to that user group. (Note: If you see a Home Screen Error message once logged in, you will need to update to 6.6 update 1 for a fix)