The following guide will show you how to configure a Log Insight cluster with Log Insight’s integrated Load Balancer. Some of the benefits of a Log Insight cluster using the internal load balancer includes the following:
- Ingestion HA – where you could lose any node in a cluster and ingestion would continue to function
- Query HA – allows any node to be lost (including the master) and features such as users alerts and queries would continue to function
- The Internal load balancer will automatically balance ingestion and queries across nodes which will provide better performance
- Scaling benefits – Log Insight 3.6 now scales up to 12 nodes per Log Insight cluster and allows up to 4TB of live searchable data under management per node
Pre-Requisites for Log Insight Cluster
- One fixed IP address must be allocated per vRealize Log Insight appliance.
- A DNS A Record and matching Reverse (PTR) should be created per appliance.
- Minimum of three nodes in a vRealize Log Insight cluster
- Two-node clusters are not supported because failover will fail in this situation
- All vRealize Log Insight nodes must belong to the same vCenter Cluster
- All vRealize Log Insight nodes and the load balancer IP (VIP) must belong to the same L2 network
- All vRealize Log Insight nodes must have the same exact Log Insight appliance virtual machine configurations (CPU, Memory, Disk)
- All vRealize Log Insight nodes (master and worker) must have the same SSL certificate
- Time must be synchronized between all nodes using an NTP server
In my lab I have built 3 separate Log Insight instances. I have entered the following into DNS and will be using the following NTP server in my lab:
| Function | IP Address | FQDN | NTP |
| VIP | 192.168.100.40 | log.lancorp.com | N/A |
| Log Insight Master | 192.168.100.41 | log-001.lancorp.com | 192.168.100.51 |
| Log Insight Worker | 192.168.100.42 | log-002.lancorp.com | 192.168.100.51 |
| Log Insight Worker | 192.168.100.43 | log-003.lancorp.com | 192.168.100.51 |
Configuring Log Insight Master Node
-
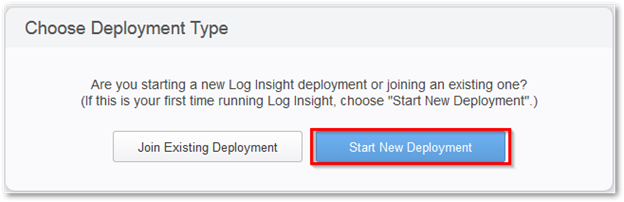
Type your Log Insight FQDN in an internet browser and click on Start New Deployment
-
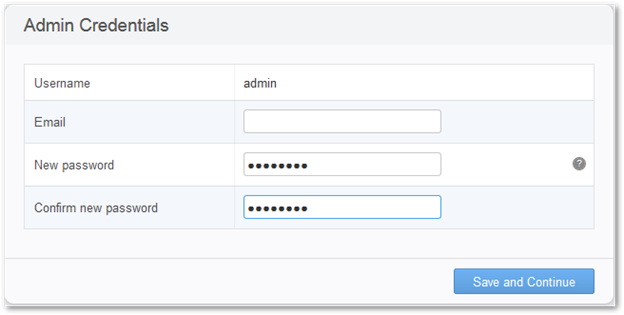
Create a password and click on Save and Continue
-
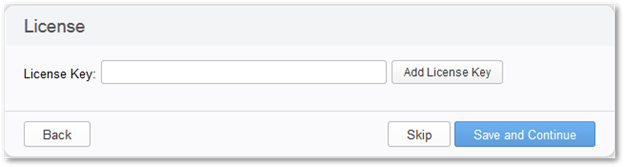
Enter a license key and click on Save and Continue
-
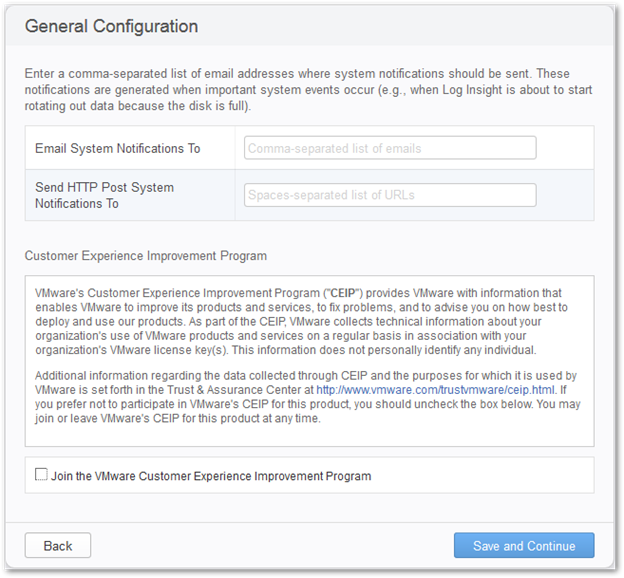
Click on Save and Continue
-
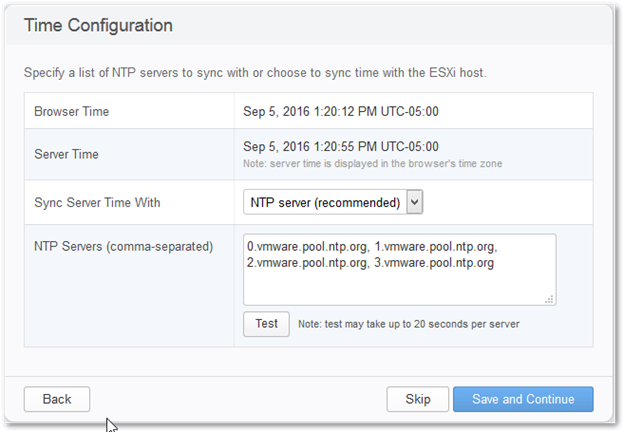
Add NTP servers and click on Save and Continue
-
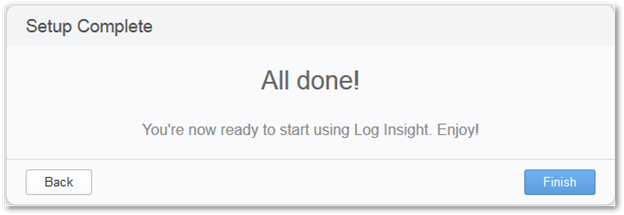
Click on Finish
Configuring vSphere Integration
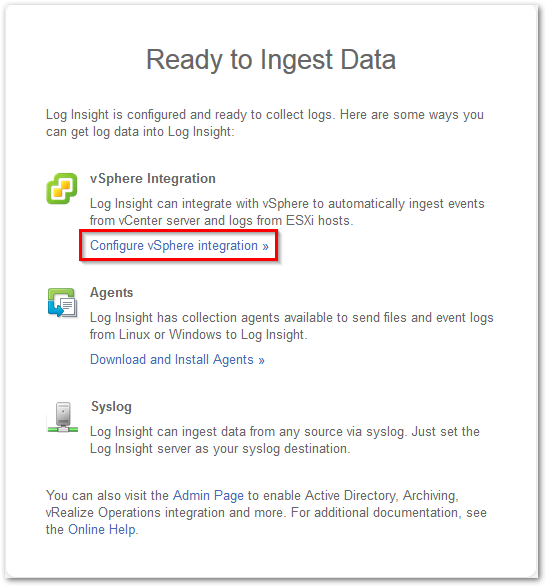
After configuring the master server we will get prompted to integrate vSphere, Agents, and Syslog to our Log Insight instance. The following steps will walk you through integrating vCenter server.
-
Click on Configure vSphere integration
-
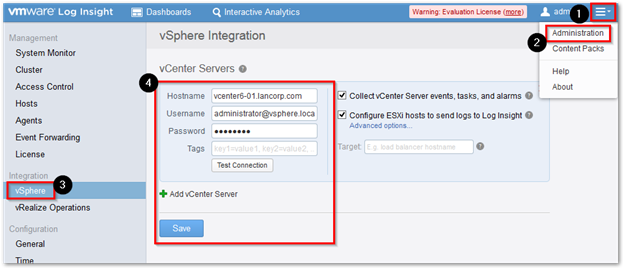
This will lead you to the Administration > vSphere page where you can enter your vCenter Server information. Make sure to test your connection and then click on Save
-
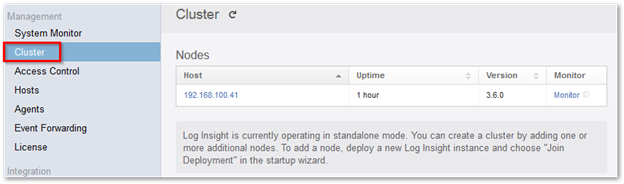
Click on Cluster on the left menu and verify that you only see one node. As you can see we only have one node. In the next few steps we will be adding two more nodes and then we will go back here again to view the new changes.
Adding the Worker Nodes
Now that the master server is installed we will need to add two more worker nodes to complete a minimal cluster. Note: we can scale up to 12 nodes, however in my lab I will only be doing the minimal of a 3-node cluster.
-
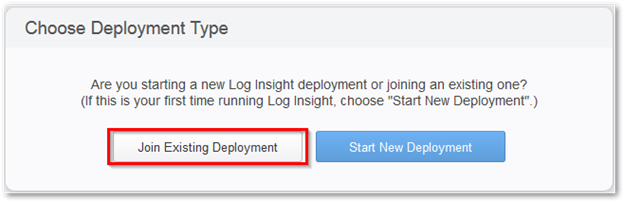
Open an internet browser and enter the FQDN of your worker node. When the wizard pops up select Join Existing Deployment
-
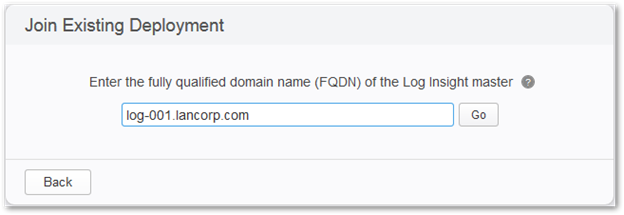
Enter the FQDN of your Master Node and click on Go
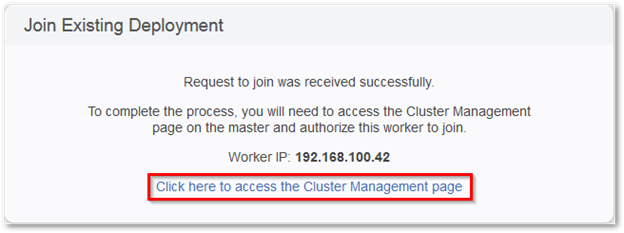
-
Click on Click here to access the Cluster Management page
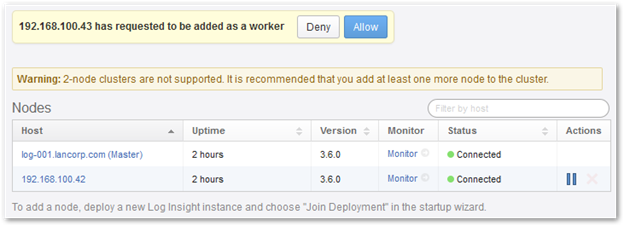
-
Click on Allow

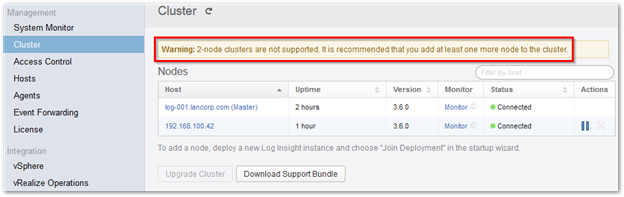
-
Notice that the warning says 2-nodes are not supported because Log Insight High Availability will not work with just two nodes
-
Repeat the steps above again to add the 3rd Node
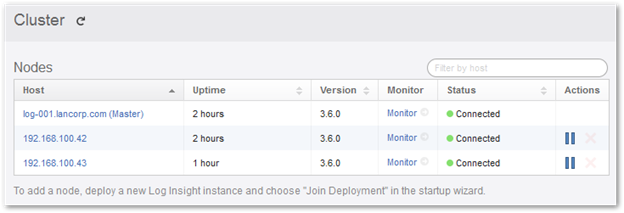
- Once the third node is added go to the Administration > Cluster view again and verify that you have 3 nodes and everything says Connected
-
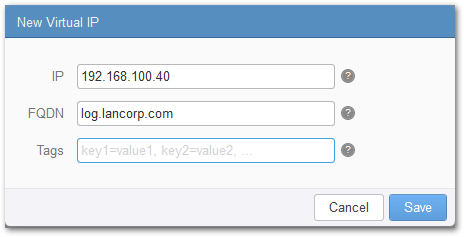
Click on New Virtual IP Address
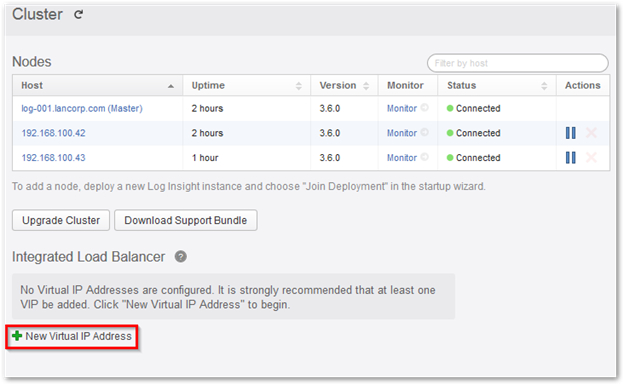
- Fill in the IP address and the FQDN of the VIP and click on Save
-
The Integrated Load Balancer should now be configured
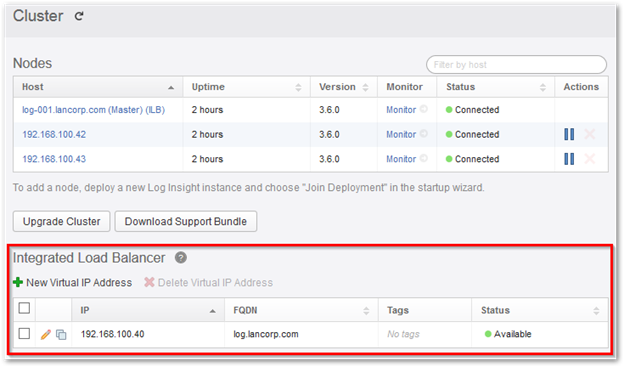
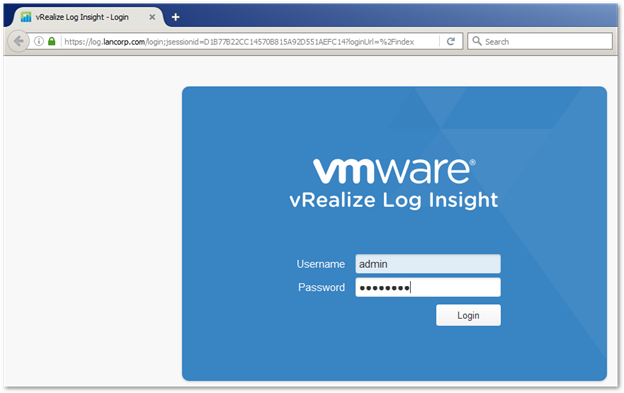
- We can now login to Log Insight using the FQDN of the VIP
Configuring Log Insight Integrated Load Balancer
Now that we have our 3-node cluster we will need to configure Log Insight’s integrated Load Balancer to point to the VIP we pre-created.