vCenter Infrastructure Navigator is a must have tool for any vSphere environment. Lot of my customers don’t even know much about the tool until I show them a demo and they immediately want it. Since vSphere already manages all your virtual servers, it just makes senses to have a tool that can detect what applications are installed on each server and to be able to search based on applications. For example, if I wanted to know how many SQL servers I have in my environment I can just type in SQL in the search box and it will pull all servers that have SQL installed. Now if your manager comes up to you and ask you what servers are linked to that one particular SQL server or better yet he ask you to delete a server that he believes no one else is using, how can you be confident to get him an exact answer. This is where Dependency mapping comes in. VIN automatically detects incoming and outgoing servers that talk to that particular server and even draws a fancy diagram for you as well. As an added bonus it even list the port numbers and the name of the process. This is why it is a must-have tool for any VMware Engineer. Below is a step by step guide on how to configure VIN and how to make the most out of the tool.
Prerequisites and Notes
- Make sure you install VIN on the same cluster as your vCenter Server
- Each instance of vCenter will need its own VIN server
-
VIN licenses is required and should work using almost any Suite license key.
Configuring vCenter Infrastructure Navigator
-
Log into the vCenter Web Client at https://{FQDN of vCenter}/vsphere-client
-
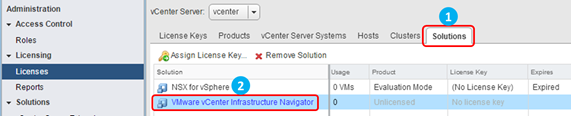
Click Licensing
-
Click Solutions, and the click VMware vCenter Infrastructure Navigator.
-
Click Assign License Key.

-
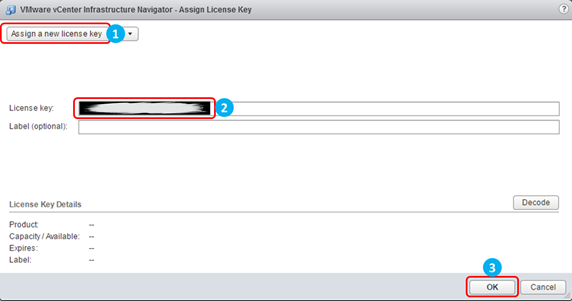
Click Assign a new license key, enter License key, and then click OK.
-
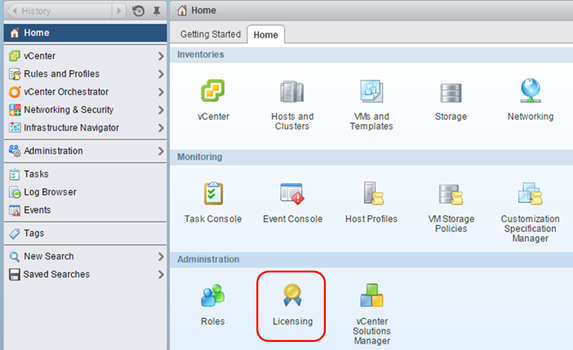
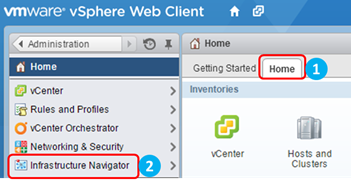
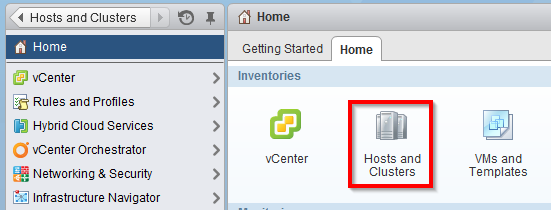
Click Home -> Infrastructure Navigator.
-
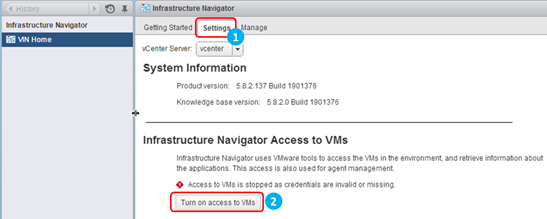
Click Settings, and then Turn on access to VMs
-
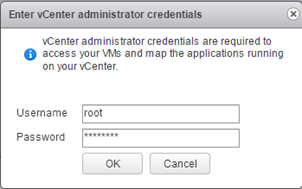
Enter the credentials and then click OK.
-
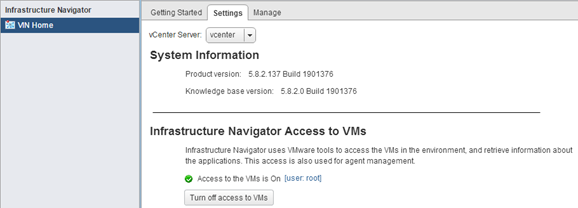
Check the status, make sure the green check for Access to the VMs is On appears.
Discovering Applications in vCenter
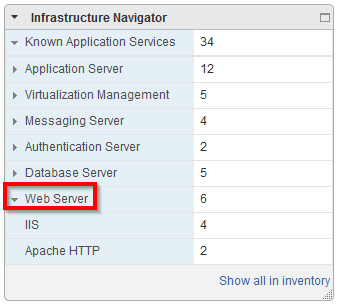
In this demonstration we will show you how to discover how many IIS servers you have in your vCenter environment.
-
Login to vCenter Web Client
-
Click on Host and Clusters
-
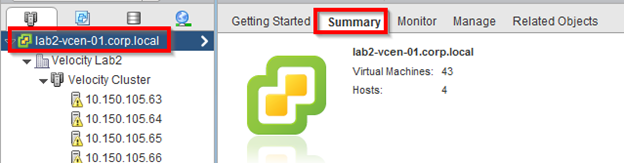
Select your vCenter Server and click on Summary
-
View the Infrastructure Navigator box

-
Expand Web Servers to see how many IIS server we have in total
-
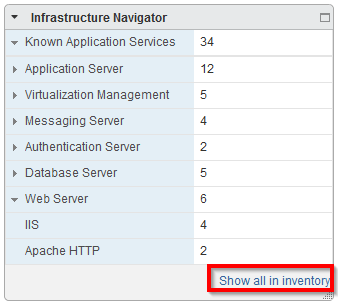
Click on Show all in inventory to view all the servers
-
In the filter box, type in IIS to view all the IIS servers
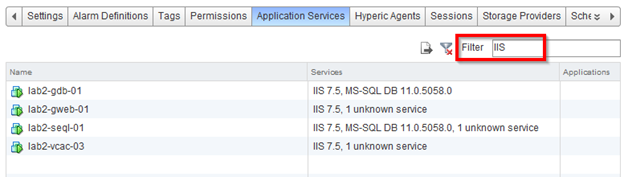
This method is an easy and quick way of viewing application services, you can filter it out by SQL, Exchange, Appache, and more.
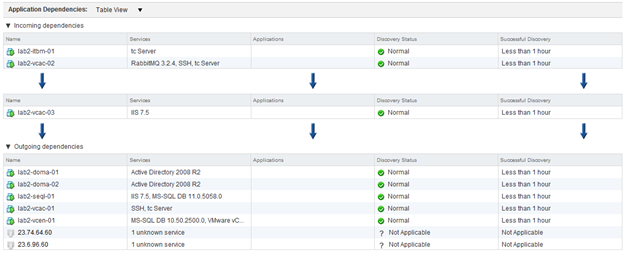
Viewing Dependencies
Viewing dependencies is a great way to see if a server is linked to any other server. This becomes very useful for example if you want to delete a VM but not sure if it will break any other applications or for knowing what ports and VMs are linked to that particular VM. This would be hard to do manually without VIN.
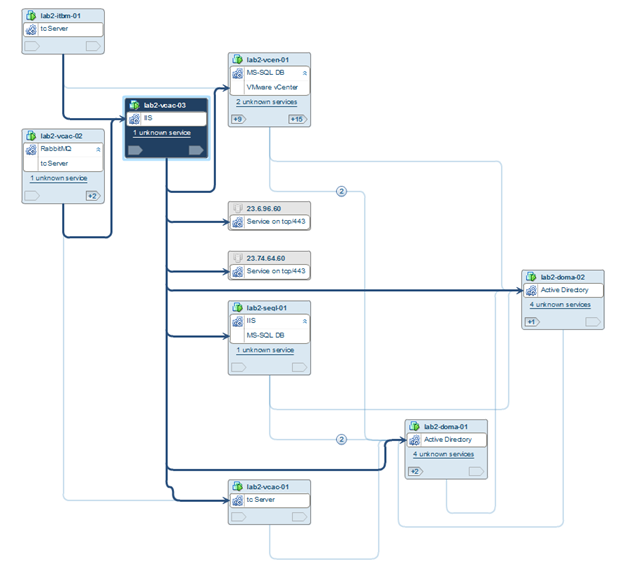
In this example we want to see what servers are linked to vCAC iAAS server.
-
Login to vCenter Web Client
-
Do a search for your VM in the search box

-
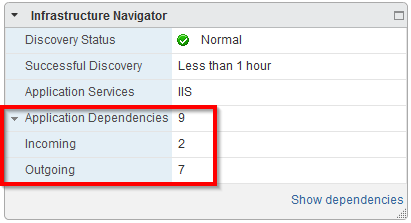
In the summary page view the Infrastructure Navigator box and expand Applications Dependencies to view Incoming and Outcoming servers
-
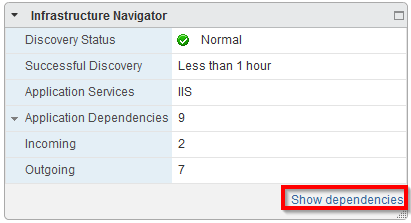
Click on Show dependencies
-
The arrows and lines shows you the Incoming and Outgoing dependencies (left side is incoming and right side is outgoing)
Adding Unknown Services
- Click on Services on the bottom of the page and check the box Show unknown services with no incoming dependencies

-
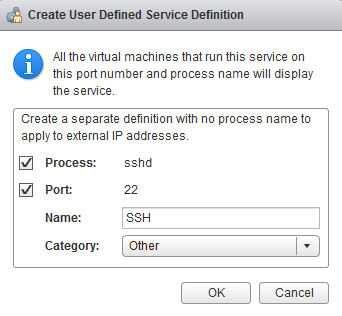
You have the option of selecting a known port such as Port 22 and click on the
 button

-
Since we know that this port that is running the process sshd is an SSH port we can label it accordingly. Click on OK to add it to the known list.
-
Our new port will now be shown in the bottom
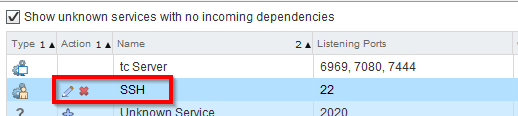
-
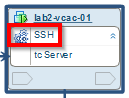
It will also be shown in the boxes as well
-
Under Map View, change it to Table View
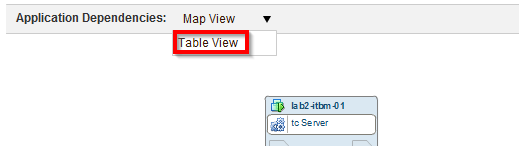
-
You can view the same mapping in a different view