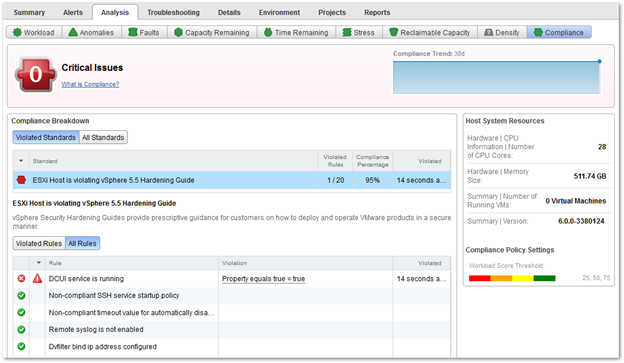
vROPs has a built-in compliance checker for ESXi Host and Virtual Machines. This is important for environments that want to automate the process of checking how secure their current environment is according to vSphere Hardening Best Practices.
Hardening Guides are an industry recognized method of implementing stricter security to meet regulatory and local security standards above and beyond frameworks like Common Criteria.
In an earlier post we have written the step by step process of how to harden an ESXi 6 Host. The following guide will walk you through on enabling the built-in compliance checker in vROPS for ESXi Host.
Step 1: Verify compliance is not enabled
First we need to verify that there is concurrently no compliance checker enabled.
-
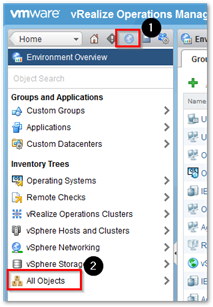
Login to vROPS and click on Environment > All Objects
-
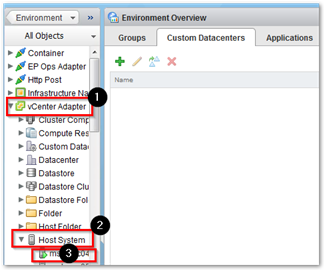
Expand vCenter Adapter > Host System and select a Host
-
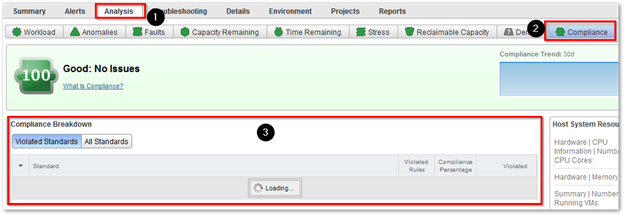
Click on Analysis > Compliance and verify that there are no Compliance Standards listed by default
Step 2: View and Modify the compliance Alert Definition
The following steps will walk you through where to find the Alert Definition for ESXi Host and Virtual Machine hardening and how to modify it as needed.
-
Click on Content > Alert Definitions and in the search box type in hardening and click on Enter

-
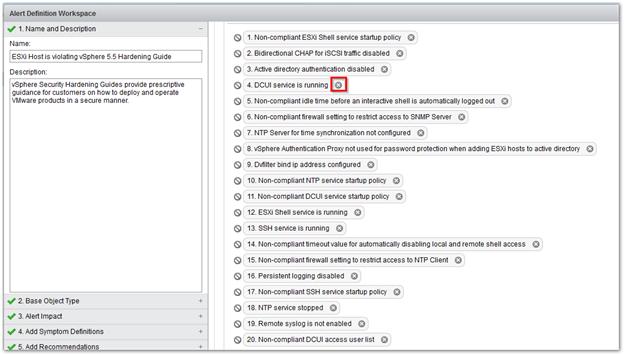
You should now see Hardening Guide for ESXi Host and Virtual Machine. Click on the ESXi Host and click on the Edit icon

-
Select 3. Alert Impact and modify the settings as needed (Optional)
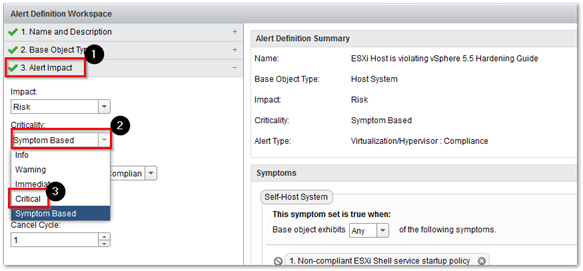
-
Under Symptoms you can view all the Symptoms and delete any symptom that is not needed by clicking on the X next to the symptom. To negate it click on the
 icon
icon
Note: to modify the default threshold for each symptom you will have to go to Content > Symptom Definition to modify it individually.
-
Click on Save once completed
Step 3: Enable the Alert Definition in Policies
Now that we modified the Alert Definition itself, we will need to enable the Alert Definition in the Policy.
-
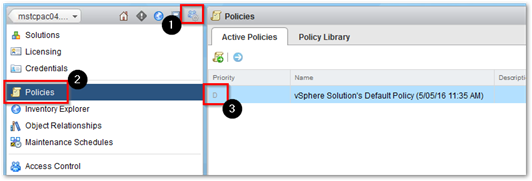
Click on Administration > Policies and verify the Default policy by looking for the policy that has the D under Priority
-
Now that we found what is the default policy we will need to go to the Policy Library tab and select the default policy and then click on the

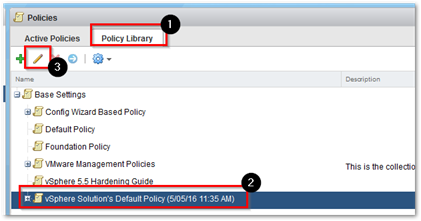
-
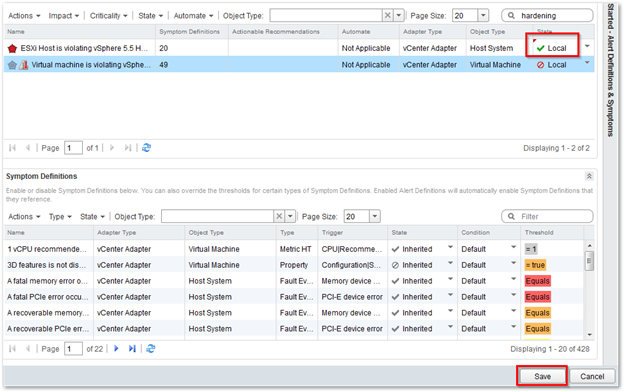
Click on 6. Alert / Symptom Definitions and search for hardening. Change the State to

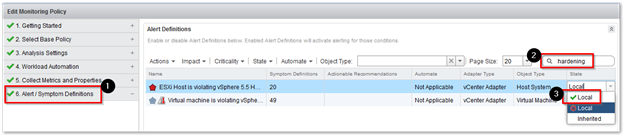
-
Verify that the state now shows
 and then click on Save
-
Wait about 5 minutes and then go back and check the Host compliance, we should now see the compliance checker working.