The following guide will quickly show you how to harden your vSphere 6 Host based on VMware’s Security Hardening guides which can be found here. The official hardening guides are in an excel format with detailed descriptions. This guide walks you through all the steps, screenshot by screenshot without reading through the excel spreadsheet. I will post Virtual Machine hardening in a future time.
-
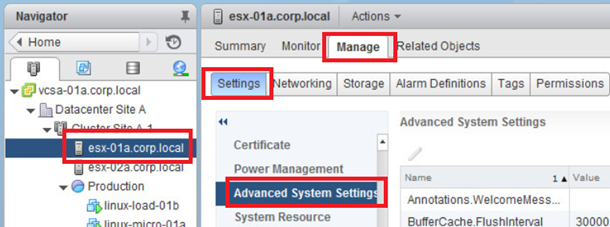
Login to vCenter Web Client with administrative credentials

-
Click on a Host and select Manager > Settings > Advanced System Settings
-
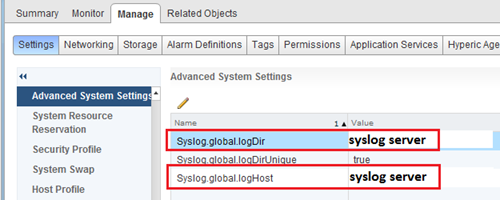
Verify that the Syslog.global.logDir and Syslog.global.logHost values should not be the default of /scratch/log. Enter a log server if applicable
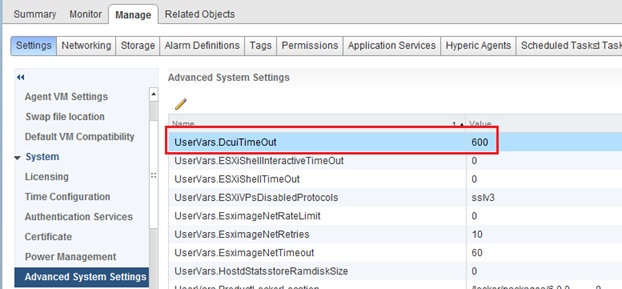
- Make sure UsersVars.DcuiTimeOut is set to 600 (default 600)
-
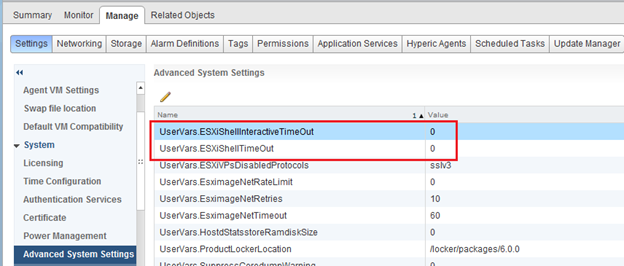
Make sure UserVars.ESXiShellInteractiveTimeOut and UserVars.ESXiShellTimeOut is set to a value greater than the default of 0
-
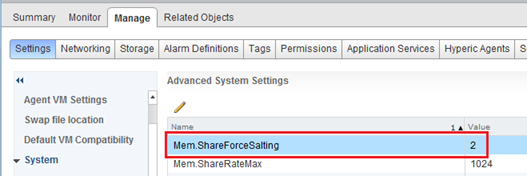
Make sure Mem.ShareForceSalting is set to a value of 2
-
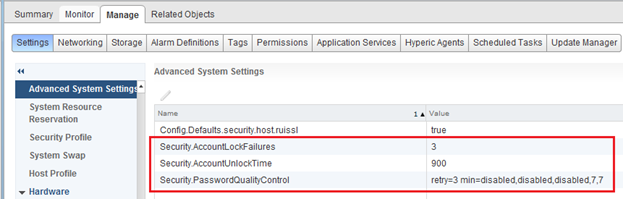
Change the following for Security
- Security.AccountLockFailures to 3
- Security.AccountUnlockTime to 900
- Security.PasswordQualityControl to retry=3 min=disabled,disabled,disabled,7,7
-
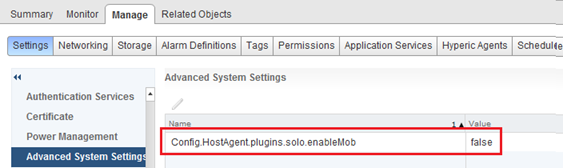
Make sure Config.HostAgent.plugins.solo.enableMob is set to a value of false
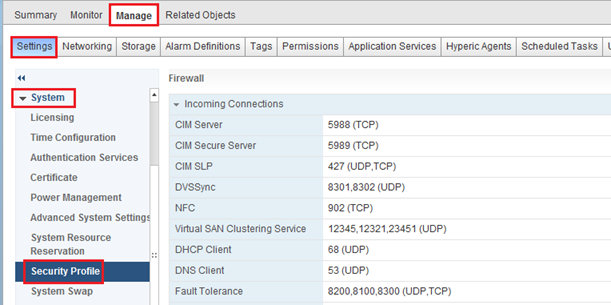
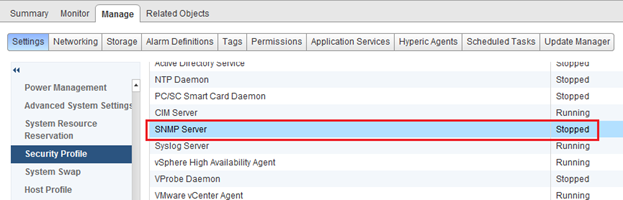
- Now navigate to Manage > Settings > Security Profile
-
Make sure SNMP Server under Services section is set to Stopped if you are not suing SNMP in your environment.
-
Scroll down to the bottom and change the Host Image Profile Acceptance Level to either VMware Accepted or VMware Certified

-
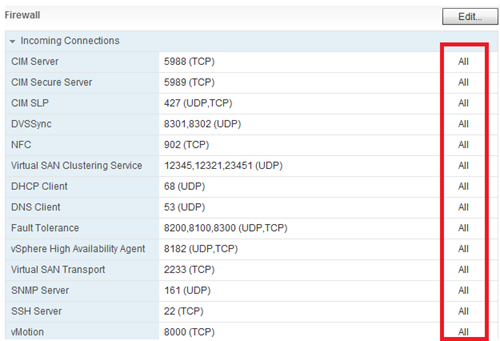
Under Firewall, all Incoming Connections and Outgoing connections should not be set to All. Set what IP Addresses are allowed to communicate with those services instead.
-
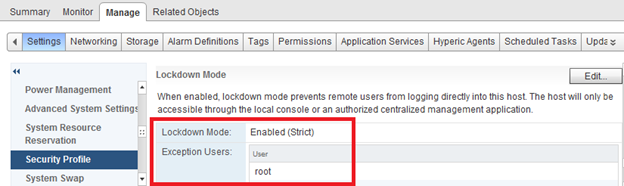
Under Lockdown Mode make sure Lockdown Mode is Enabled (Strict) and Exception Users are added accordingly.
-
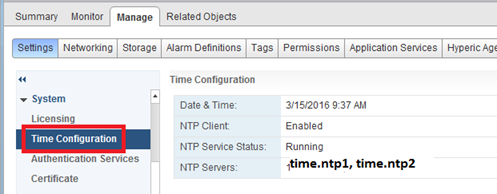
Navigate to System > Time Configuration on the left menu and make the following:
- NTP Client is Enabled
- NTP Service Status is Running
- NTP Servers are set with NTP Servers
-
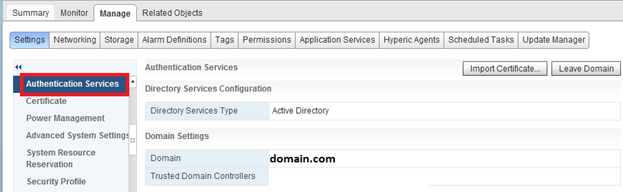
Navigate to Authentication Services and verify that Domain and Trusted Domain Controller settings are configured as appropriate
-
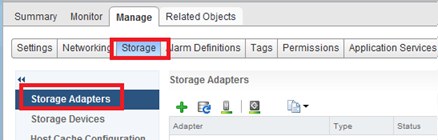
Now navigate to Manage > Storage > Storage Adapters and for EACH iSCSI Adapter, scroll for Authentication section under Adapter Details section > Properties tab. The Method parameter should be set to Use bidirectional CHAP
- Once you completed the host hardening make sure everything is working such as vMotion, DRS, etc. Once you verify everything is working, it is highly recommended to create a Host Profile from the host and remediate it out to the other host in your environment. Also export the Host Profile as well so all you work isn’t lost.