With the Introduction of Platform Service Controller in vSphere 6, building a whole new vCenter 6 environment might make more sense than to upgrade in many cases. For example in environments where we want to move from a vCenter Windows deployment to a vCenter Appliance deployment or to start over from scratch with external PSCs in HA mode.
This guide shows you how to migrate Host and VMs on a vCenter with a DVS switch quickly without any downtime (alternative method). Please note this is just another way of migrating vCenters with DVS switches and is not supported by VMware. The official way of doing this migration that is supported by VMware is on this link https://kb.vmware.com/kb/1029498
Prerequisites and Important Tips
- Once again I must emphasize that the following guide is not supported by VMware
- This guide only applies if you are running a vDS switch
- VMFS-3 has been deprecated in vSphere 6
- Make sure you recreate the Datacenters and cluster in the new vCenter 6 environment. Set up the HA settings for the Cluster as well prior to host migration
- DRS and Storage DRS needs to be set to manual or disabled on both vCenters during the entire process
- It’s important to test one host and some non-important VMs first to verify that the process will work. Make sure to open a command prompt and do a continuous ping on the test VMs and the host to make sure they don’t lose network connectivity in any part of the process.
- Moving the VMs will not save your folders and permissions structure. You can use powershell scripts on the following blog http://virtuallyjason.blogspot.com/2015/02/copying-vm-folders-and-permissions-from.html
-
It is recommended to license the new vCenter site with ESXi and vCenter license.
Step 1: Migrating the DVS switch
A DVS switch can easily have over 20+ Portgroups, each with different VLANs. Rather than recreate this from scratch in the vCenter 6 environment, it will be much easier if we just export the DVS configuration from our vCenter 5 environment and import it to the vCenter 6 environment.
-
Login to the vCenter Web Client on the 5.x environment
-
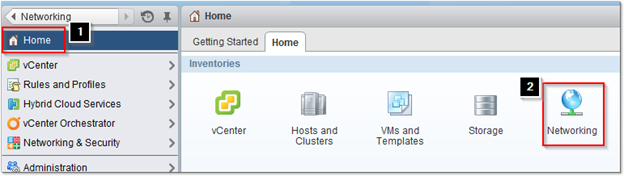
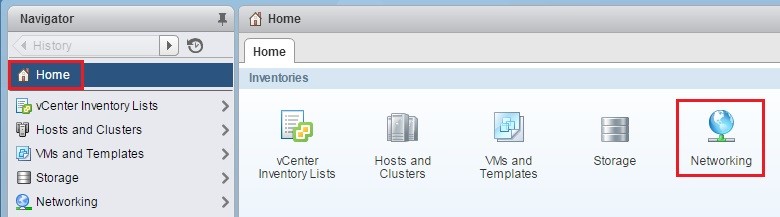
Click on Home > Networking
-
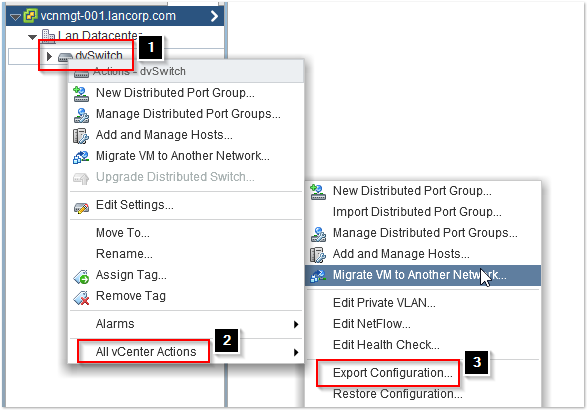
Right click on the DVS switch and click on All vCenter Actions > Export Configuration
-
Select Distributed switch and all port groups and Click on OK

-
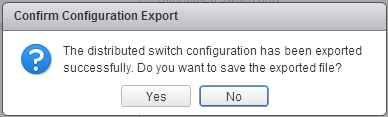
Click on Yes to save the DVS configuration
-
You should now have a zip file backup of your DVS switch. Repeat these steps to export all DVS switches if you have more than one.
Step 2: Importing DVS switch to new vCenter 6.x Environment
-
Login to the vSphere Web Client on the new vCenter 6 environment

- Click on Home > Networking
-
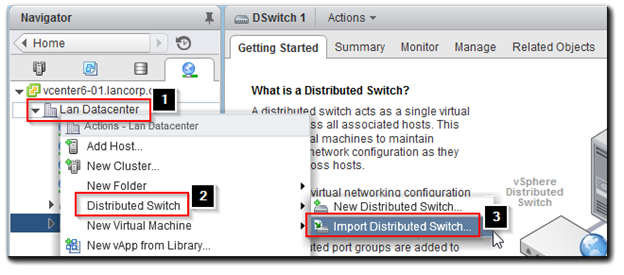
Right click on the Datacenter or Cluster we want to import the switch to and select Distributed Switch > Import Distributed Switch
-
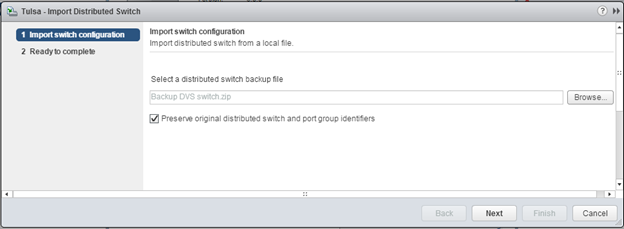
Browse for the file and make sure Preserve original distributed switch and port group identifiers is checked and click on Next
-
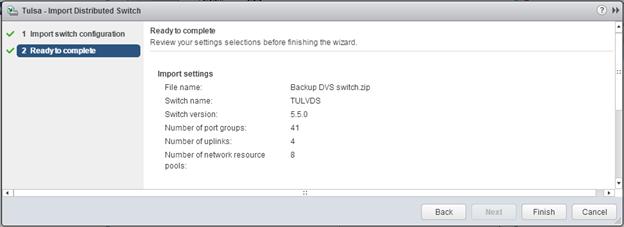
Verify that the number of port groups match the original and click on Finish
Step 3: Migrating the Host
Next we will need to migrate the host from vCenter 5 environment to the vCenter 6 environment.
-
Make sure DRS and Storage DRS is disabled or set to manual on both environments before we begin.
-
Login to the vSphere 5 Web Client

-
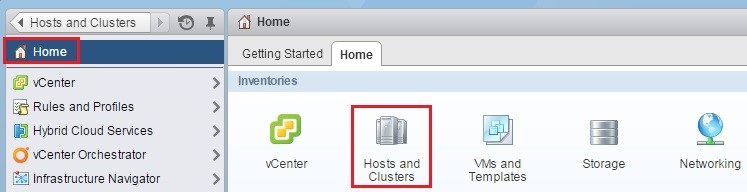
Go to Home > Hosts and Clusters
-
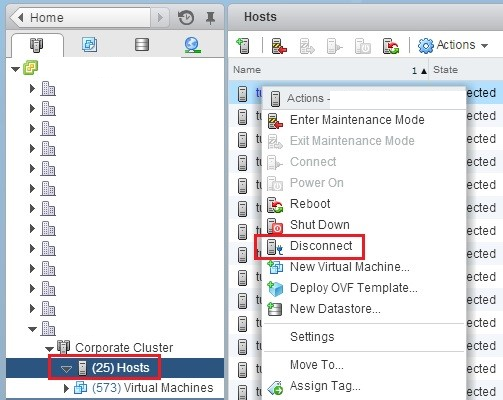
Right click on a Host we want to migrate and select Disconnect
-
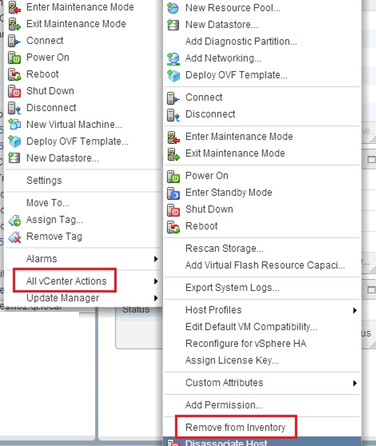
Right click on the Host again and select All vCenter Actions > Remove from Inventory
-
Now go to the vCenter 6 Web Client and right click on the Cluster you want to import the Host to and select Add Host
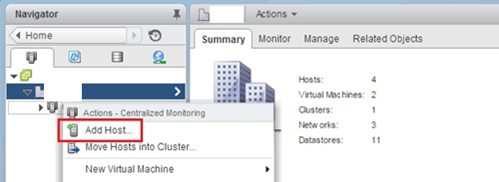
-
Follow the prompts to import the host and do a ping test on your VMs to make sure they are still online.
Step 4: Registering Host and VMs to DVS switch on our vCenter 6 environment
The following next few steps have to be done very carefully and a high knowledge of DVS switches is highly recommended. Also it is recommended to do continuous ping test throughout the process to make sure nothing breaks during the entire process.
-
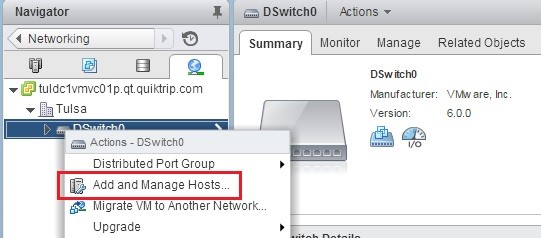
Next we need to add our host to the DVS switch. Go to Home > Networking

-
Right click on the VDS switch we imported previously and select Add and Manage Hosts
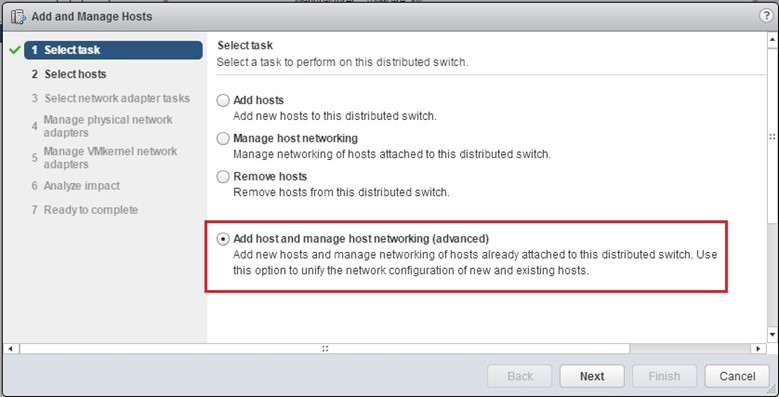
-
Select Add Host and manager host networking (advanced) and click on Next
-
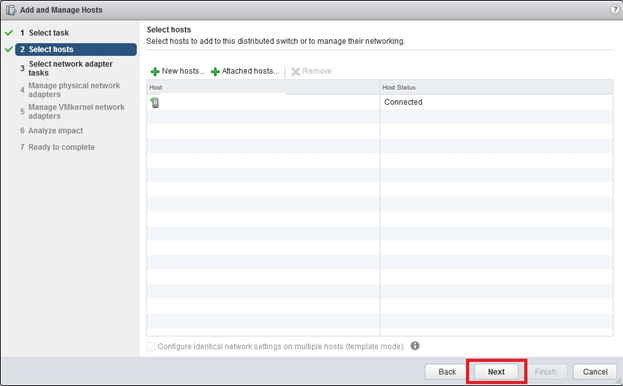
Click on New Hosts
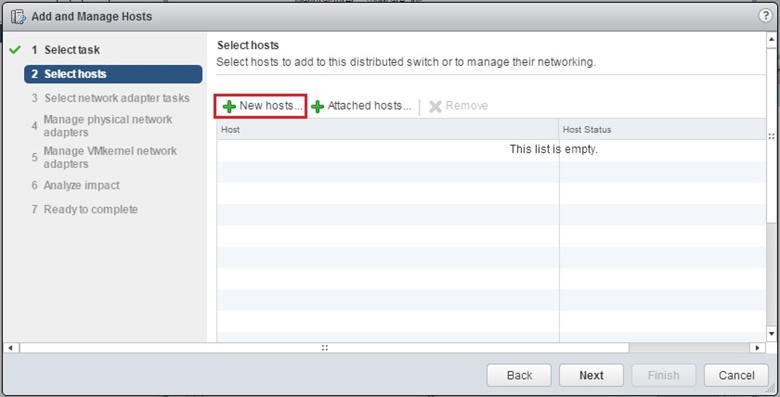
-
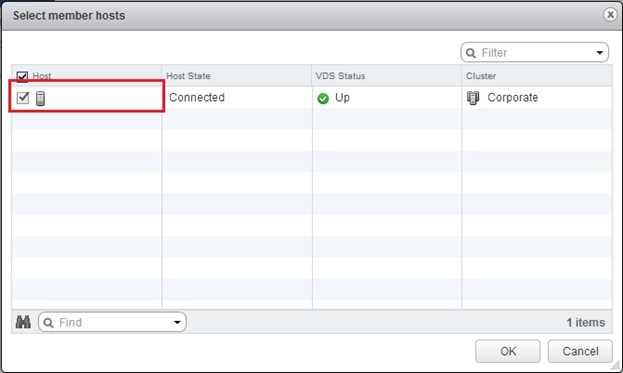
Select your Host and click on OK
-
Click on Next
-
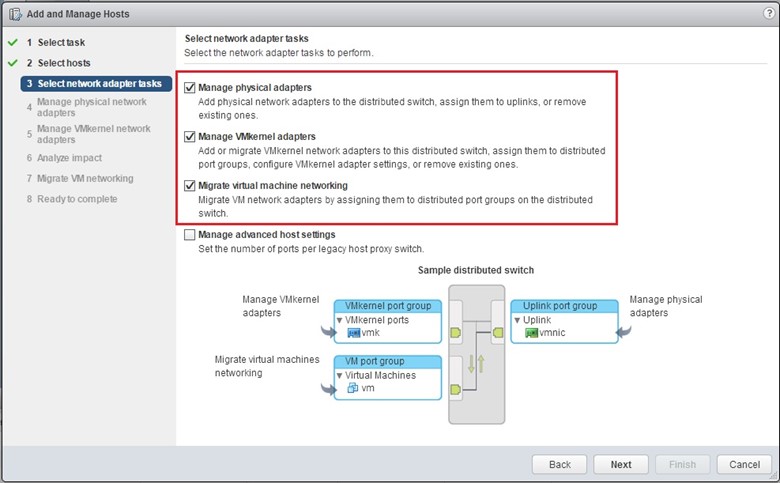
Select Manager Physical Adapters, Manage VMkernel Adapters, and Migrate virtual machine networking and click on Next
-
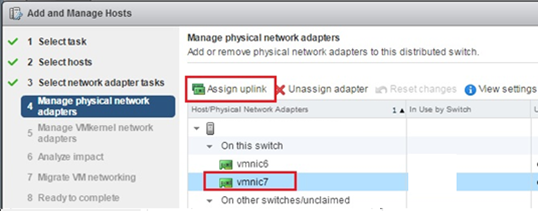
Highlight the Uplinks on the original DVS switch and click on Assign uplink
-
Select an available uplink and click on OK
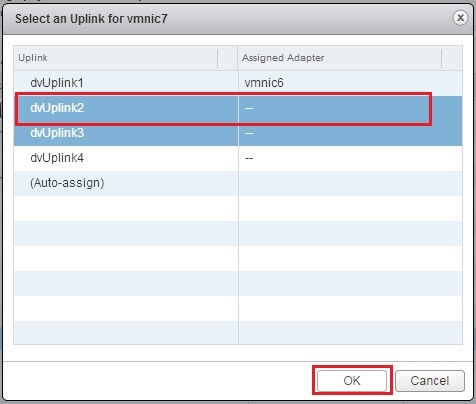
- Repeat the process for both original DVS uplinks (if you have more than one). Important! Verify
you have Uplink Port Group for your DVS
and then click on Next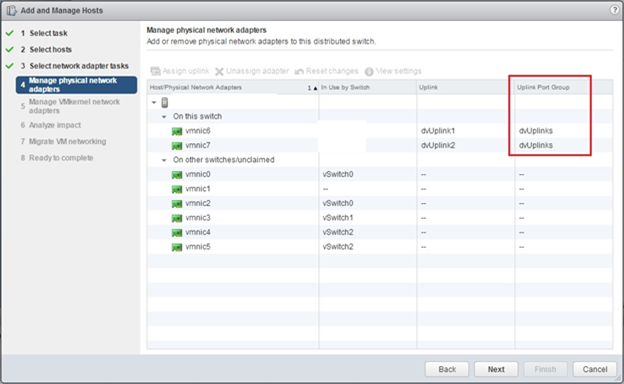
-
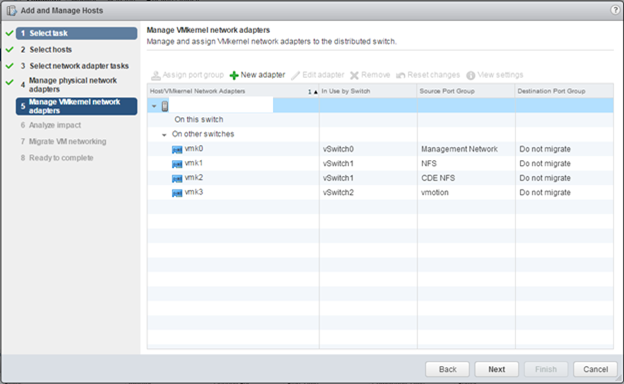
Very Important!
If you had VMkernel network adapters on your DVS switch make sure you switch them over to your new Destination Port Group. If you had any or all your VMkernel network adapters on a standard vSwitch then you don’t need to migrate anything on a standard vSwitch. Check your settings carefully and then click on Next.(In the example below all our VMKernel are on a vSwitch so there was no need to migrate)
-
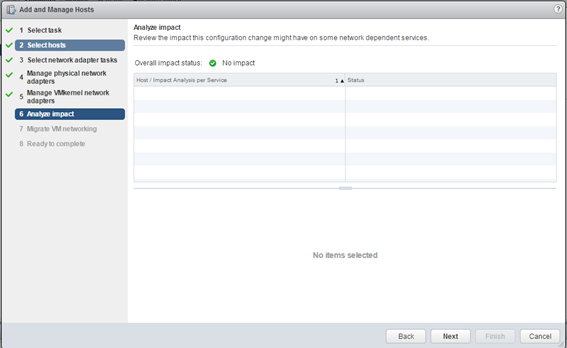
Review the impact and click on Next
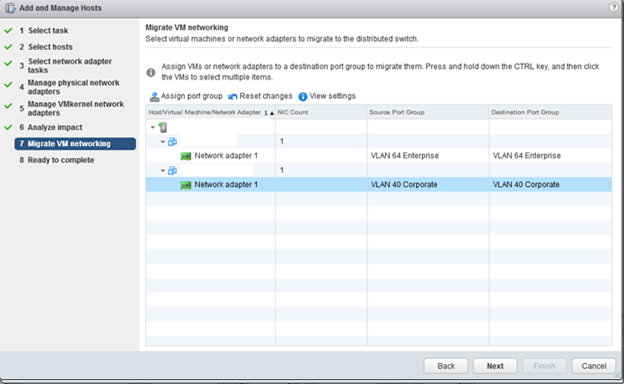
- For each VM, we need to set each Destination Port Group to the same name as the Source Port Group. Once again review your settings to make sure each VM has a Destination Port Group. The Source Port Group and the Destination Port Group name should match because we exported the DVS switch over. Click on Next once you verified all VMs has a matching Destination Port Group
-
Review the settings and click on Finish
-
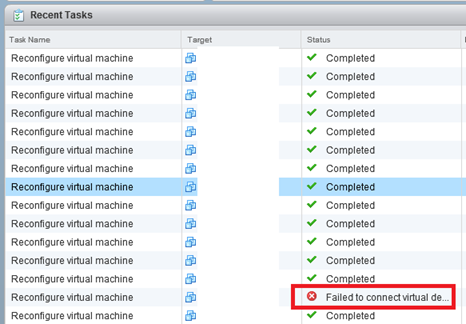
Very important, look at the recent task and make sure all the VMs switched properly. If any of them errored out. Right click on the VM and manually switch the VM networking.
-
Test and ping your Host and VMs again to make sure they haven’t lost connectivity
- If everything is successful, repeat the process for all the other host. Take your time to review each and every setting carefully. Once again this method of migrating is not supported by VMware. Do everything on your own risk!