The Following guide will show you how to install vRealize Automation 7 in minimal deployment mode. The guide also walks you through how to configure SQL Server and other prerequisites.
Prerequisites
This section presents detailed prerequisites required prior to the installation of all components of vRealize Automation Center 7.0
vRealize Automation Center Server Virtual Machine Prerequisites
To prepare for installation of the vRealize Automation Center server virtual machine you must first build a Windows Server with the following Prerequisites.
- Verify that the virtual machine is configured with the following hardware and software:
- 2 vCPUs or more.
- 4GB RAM or more.
- 30GB disk space or more. VMware recommends creating a separate partition for use by the virtual machine.
- Windows Server 2012 R2 virtual machine, with the most current updates.
- Static IP address.
- Verify that the vRealize Automation Center Server is joined to a domain.
- Create a domain user account (for example, vrasrvacc) in Active Directory.
- Log in to the vRealize Automation Center Server as administrator.
-
Add the vrasrvacc account to the local administrators group.
Installation Prerequisites of vRealize Automation Center Database Server
To verify the prerequisites for installation of vRealize Automation Center database server
- Log in to the Microsoft SQL server with local administrator privileges.
-
Configure MSDTC and start the service if it is not already running, as follows:
- Open Component Services from Administrative Tools.
- Expand Component Services > Computers > My Computer > Distributed Transaction Coordinator.
- Right-click Local DTC and select Properties.
- Click the Security tab.
- Select Network DTC Access.
- Select Allow Remote Clients.
- Select Allow Inbound and Allows Outbound.
-
Select Mutual Authentication Required.
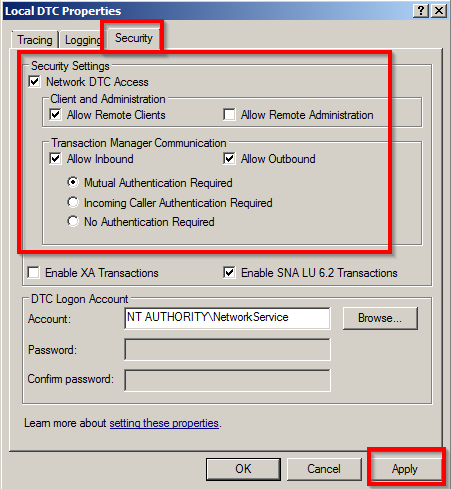
- Click Apply
- In the warning message dialog box stating that the MSDTC service will be stopped and restarted, click Yes.
- Click OK in the MSDTC service has been restarted dialog box.
- Open Component Services from Administrative Tools.
-
Configure the database TCP/IP protocol as follows:
- For Sql 2008: Click Start > Microsoft SQL Server 2008 R2.
- For SQL 2012: Start > Microsoft SQL Server 2012
- Click Configuration Tools.
- Open SQL Server Configuration Manager.
- Select SQL Server Network Configuration.
-
Select Protocols for MSSQLSERVER.

- Right-click TCP/IP and select Enable (if it is not already enabled).
- Close SQL Server Configuration Manager.
- For Sql 2008: Click Start > Microsoft SQL Server 2008 R2.
-
Configure the database credentials as follows:
- Open SQL Server Management Studio.
- On the Connect to Server screen, type the SQL Administrator credentials and click Connect.
-
Add the vrasrvacc account to the logins.
- Security > Logins
- Right click on Logins and choose New Login
- Select Windows Authentication and click on Search to search for Service account
- Make sure to change the Locations to the domain and click on OK
- Security > Logins
-
Add the vrasrvacc account to the sysadmin role so that it can create the database and alter its size.
- Click on Server Roles
- Check Sysadmin and click on OK
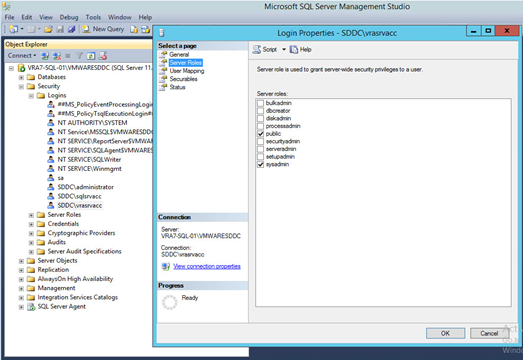
- Click on Server Roles
- Open SQL Server Management Studio.
- If you are using SQL Server Express, set the SQL Server Browsing service to automatic, and start it.
- Make sure to turn off all firewall settings on the SQL server
Installing vRealize Automation
-
Download the vRA 7 appliance from vmware.com and deploy the OVF
-
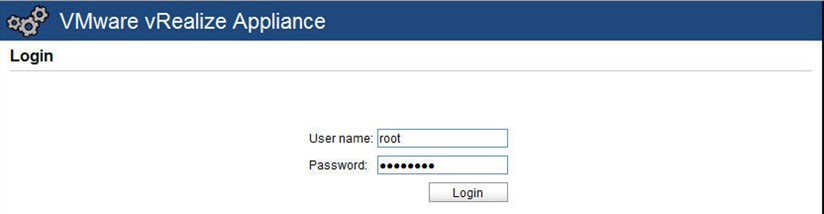
Open a browser and go to https://FQDN-vAPP-Appliance:5480
-
Enter username Root and the password you set during the appliance installation
-
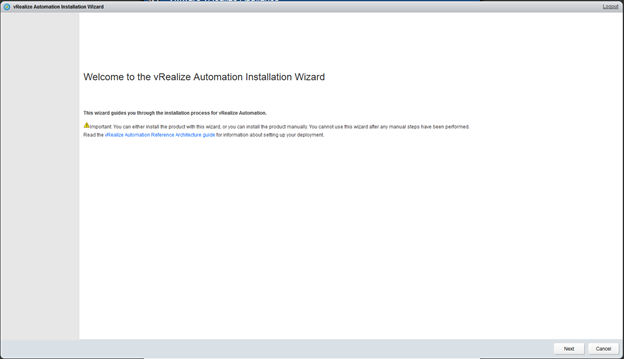
Click on Next
-
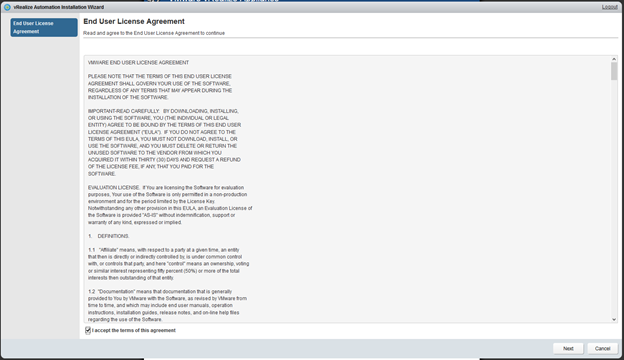
Click on Next
-
Select your deployment method and click on Next

-
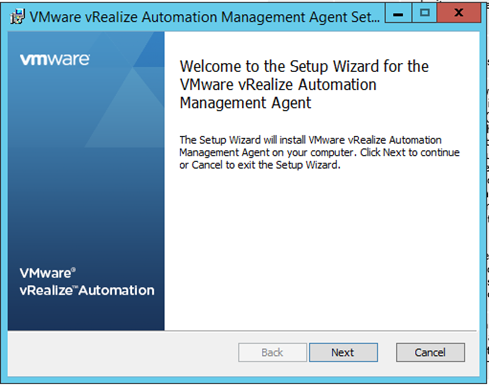
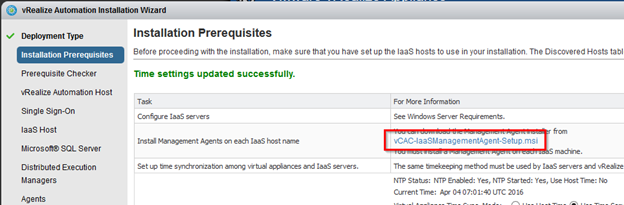
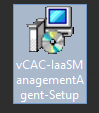
Download the Install Management Agents by clicking on vCAC-IaaSManagementAgent-Setup.msi
-
Run the installer on your Windows IAAS machine
- Click on Next
-
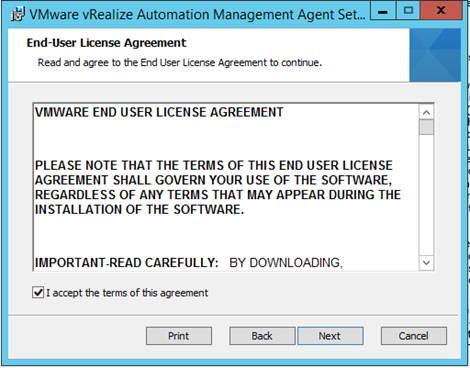
Accept the License agreement and click on Next
-
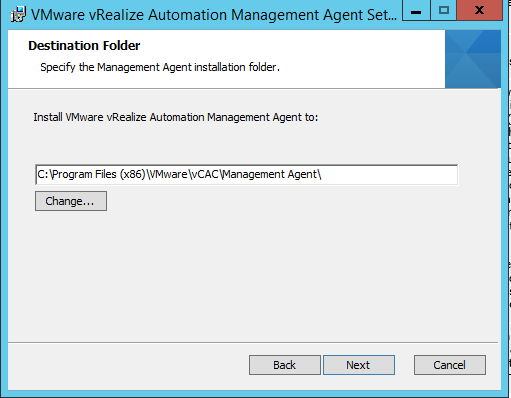
Keep the default destination and Click on Next
-
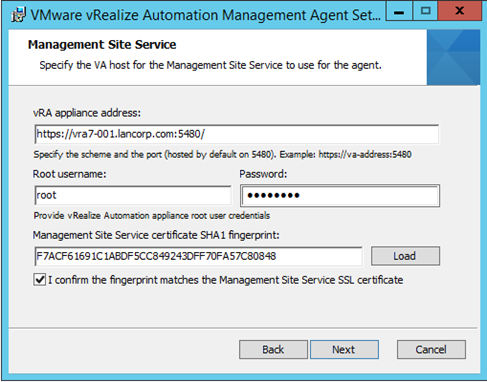
Enter the vRA appliance information and click on Load to load the fingerprint. Click on Next
-
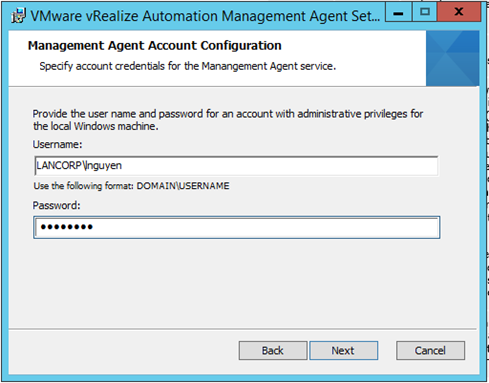
Enter the credentials with Admin rights and click on Next
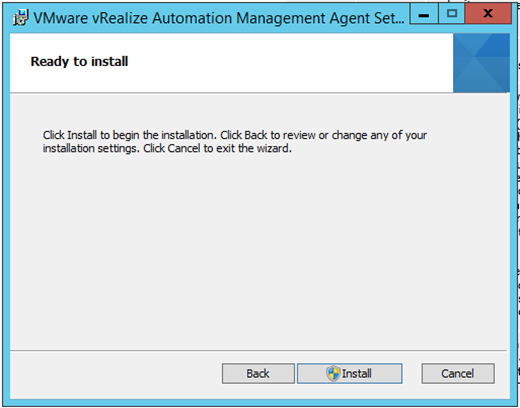
- Click on Install
-
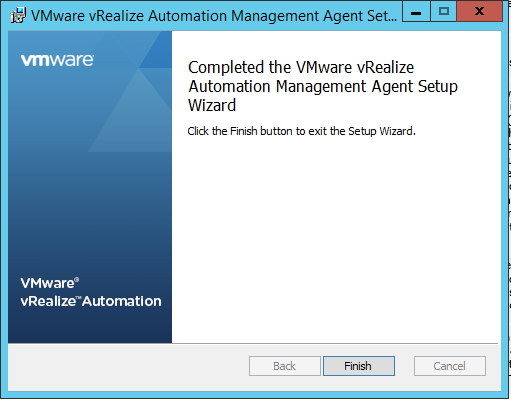
Once the install is completed click on Finish
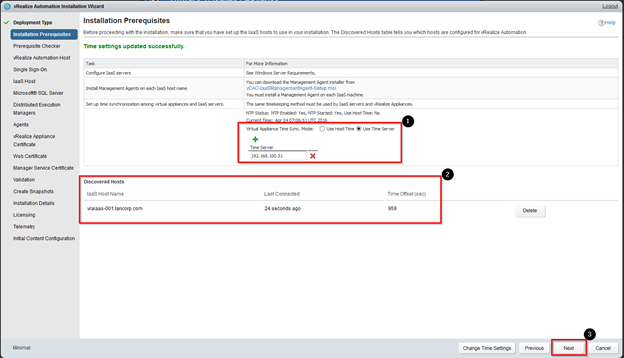
- Now go back to your Installation wizard and enter a Time Server. Notice how your IAAS windows server is now discovered. Click on Next
-
Run the prerequisite checker
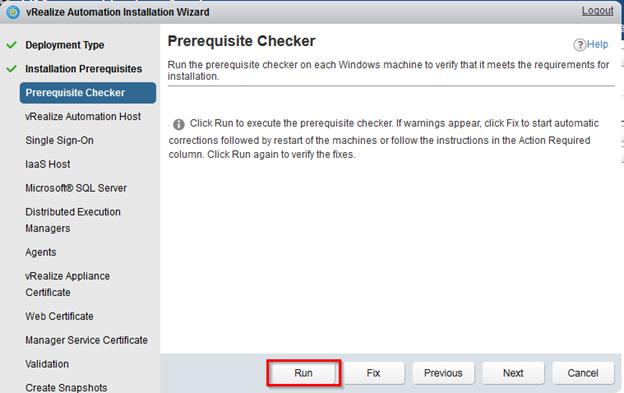
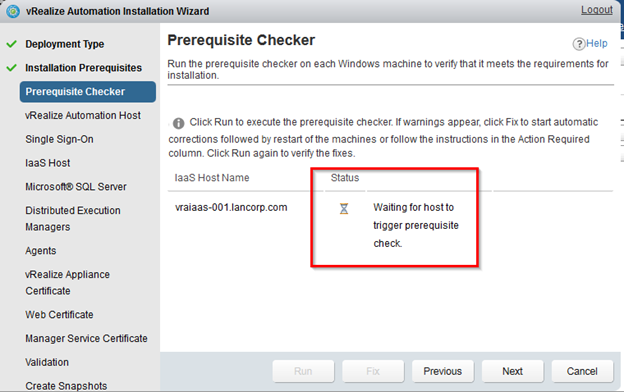
-
Wait a few minutes for it to check prerequisites
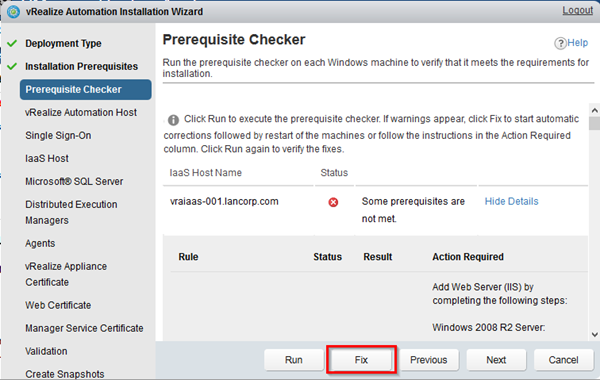
-
You can choose to review the results and click on Fix to update all errors
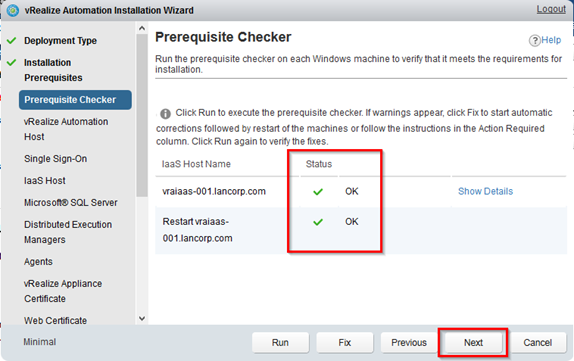
-
Once all errors are fixed you will see a Status of OK. Click on Next
-
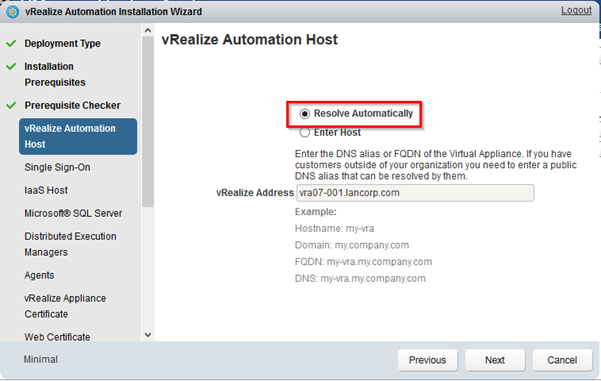
Click on Resolve Automatically and click on Next
-
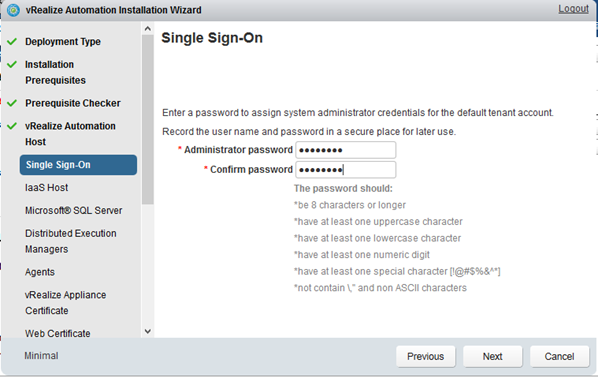
Enter the Single Sign-On password and click on Next
-
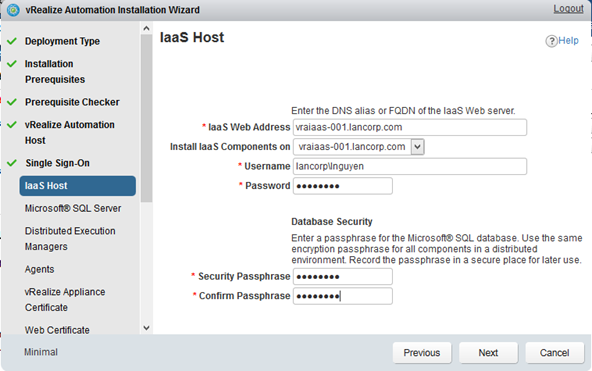
Enter your IAAS Host information and click on Next
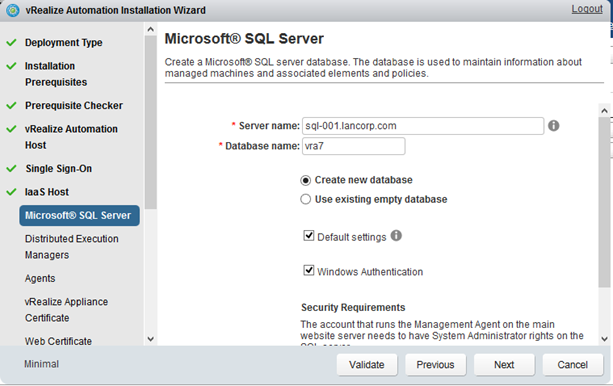
- Enter your SQL server information and click on validate when completed. Click on Next if the connection to SQL is validated.
-
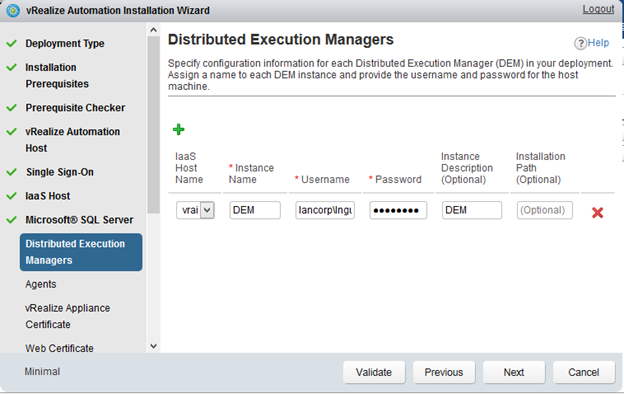
Enter the service account to be used for the DEM and click on Next
-
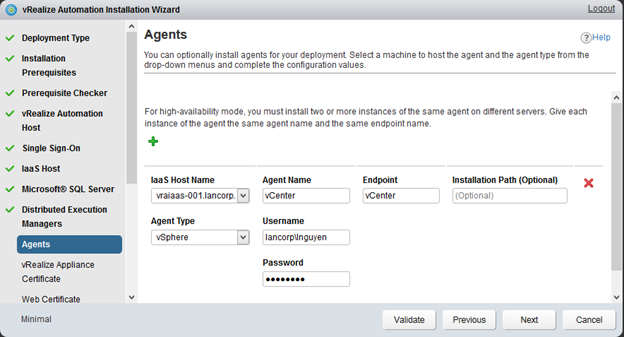
Enter the service account to be used by the Agents an click on Next
-
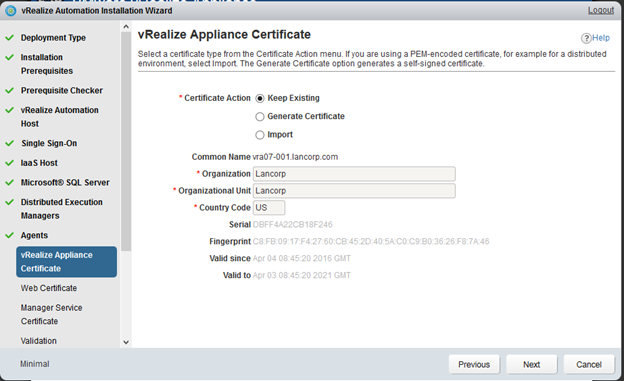
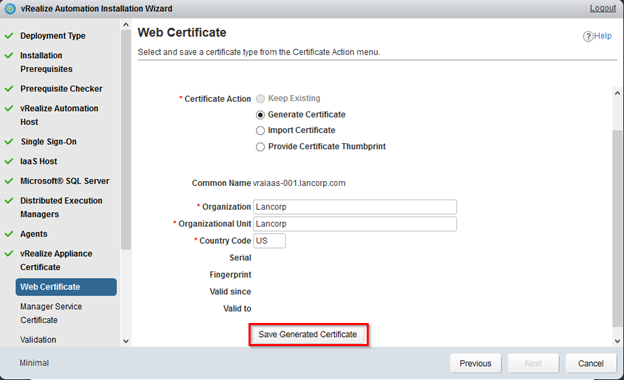
Select your certificate choice and click on Save Generated Certificate
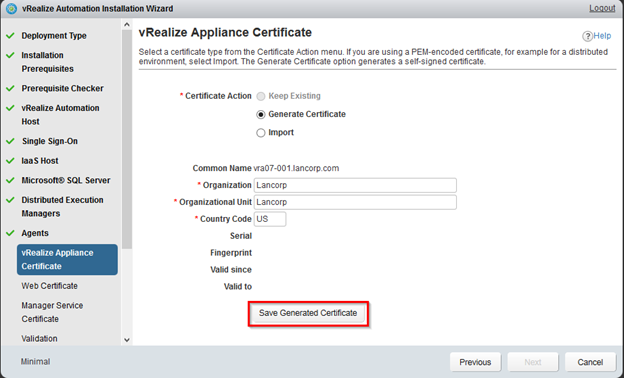
-
Then click on Next when completed
-
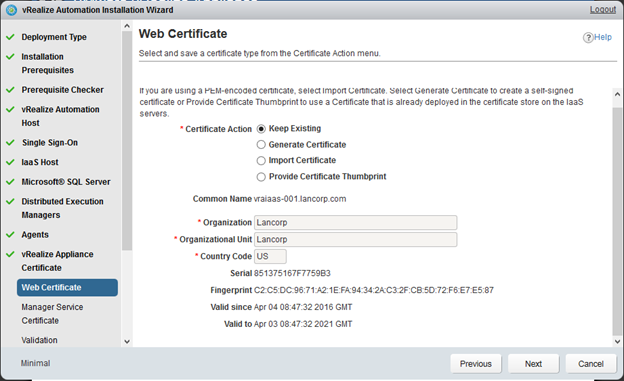
Repeat the same process for the Web Certificate.
-
Click on Next
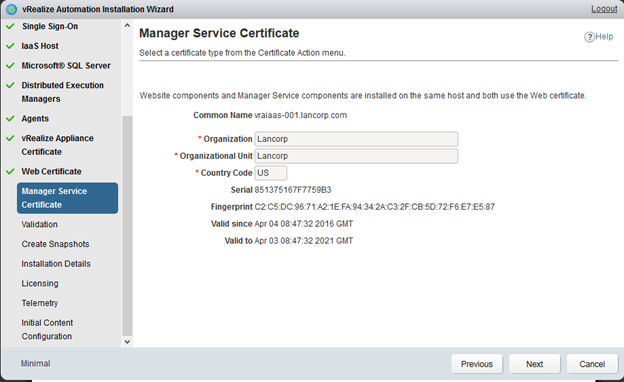
-
Click on Next
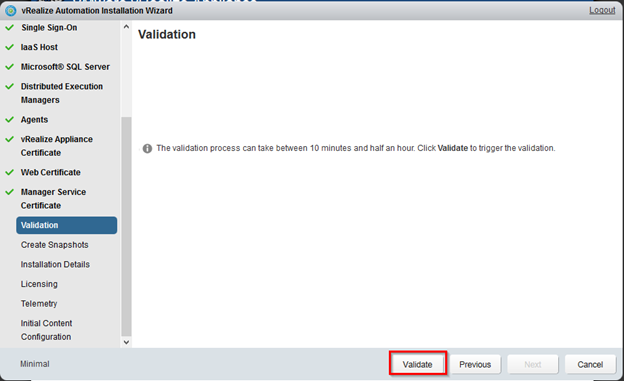
-
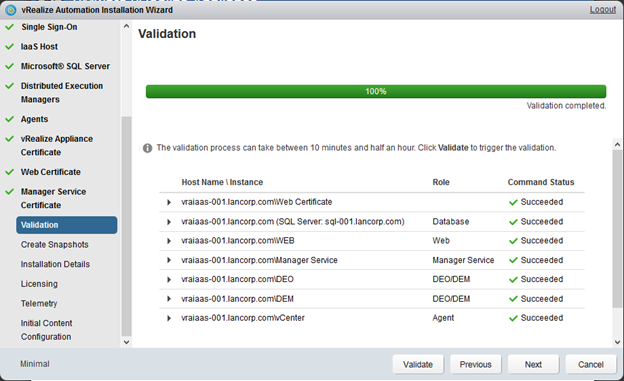
Click on Validate
-
Once complete make sure everything is Succeeded and click on Next
-
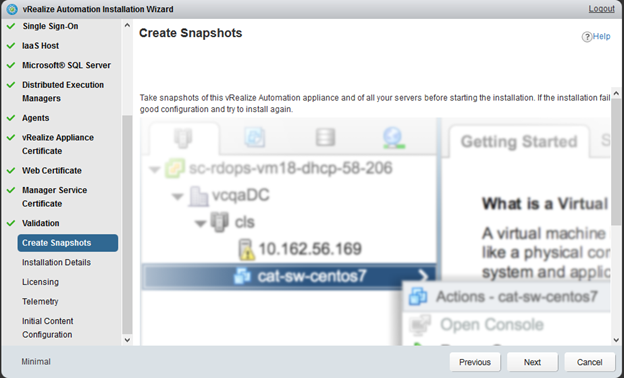
Now is a good time to take a snapshot before we start the install of vRA. Click on Next when snapshot is completed.
-
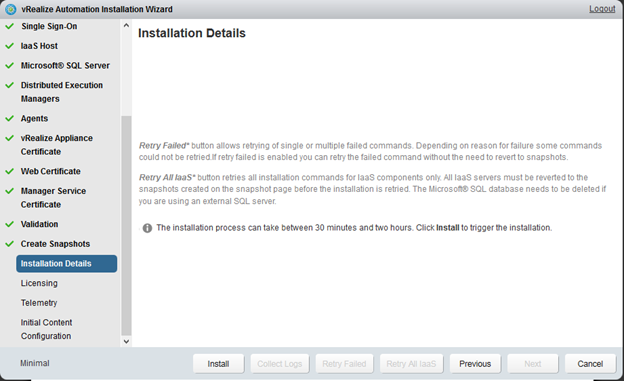
Click on Install to start the installation of vRA.
-
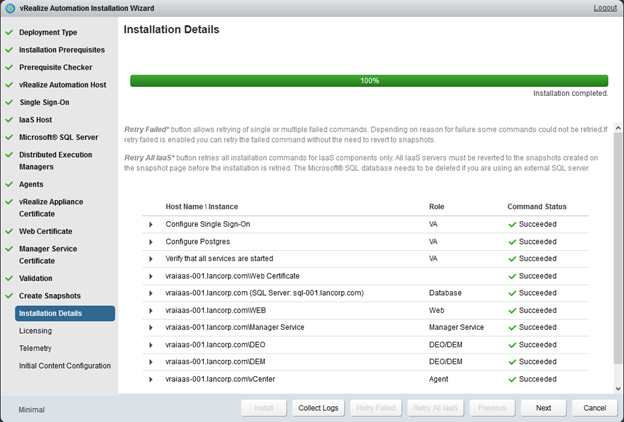
Verify that every is succeeded and click on Next
-
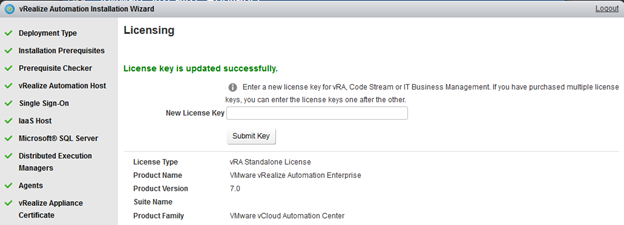
Enter the License Key and click on Next.
-
Click on Next
-
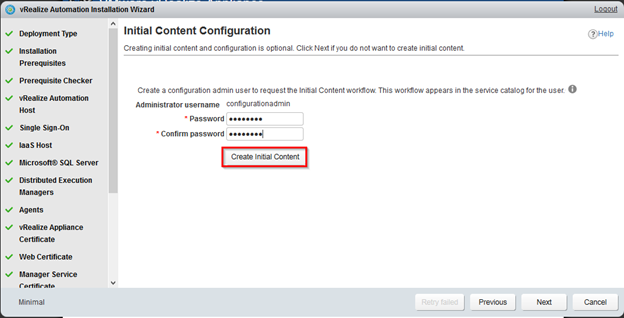
Set a password for the configurationadmin account and then click on Create Initial Content. Click on Next
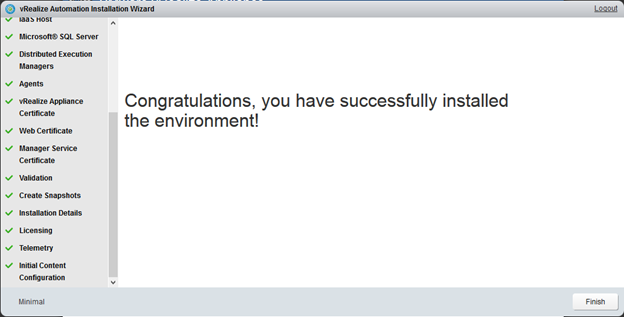
- Click on Finish