The ping adapter allows you to ping and monitor any IP address, almost any DNS names, a complete subnet, or even a range of IPs. Best of all it is already built-in to vROPS 8.2. All you need to do is activate the adapter and configure what you would like to monitor. Installing and setting up the ping adapter is so easy that is becomes a no brainer on why not to use it. It also measures latency and packets drops as a bonus. It is highly recommended to use it to ping critical URLs, Physical servers, switches, and more.
This guide will walk you through the following steps
- VMignite.com Best Practices and Notes
- How to install the VMware vRealize Ping adapter
- How to ping a single IP or DNS server
- How to ping a full subnet, URL, or even a range of IP Addresses
- How to ping an existing ESXi Host or VM
- How to use a metric config file to ping many objects
VMignite.com Best Practices and Notes
- You can ping up to 5,000 IP’s per adapter
- Only valid Top Level Domains accepted for FQDN (sorry .local or .lan fans)
- When creating an alert, use the metric Average Latency (ms) is not greater than 0 to indicate that the object is down
- Use the metric config file method if you would like to have everything backed up using the vROPS 8.2 content management backup feature. This will save you tons of work just in case you lose your vROPS infrastructure.
- Use it to monitor critical URLS and Physical servers. Then add it to a 24/7 critical monitoring dashboard. Just remember to use scoreboards and set the refresh to On
How to install the Ping Adapter
No need to download any additional files. It is pre-installed in vROPS 8.2.
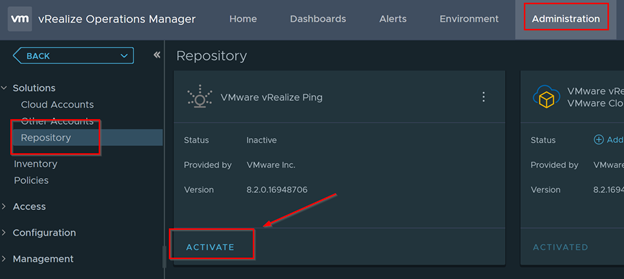
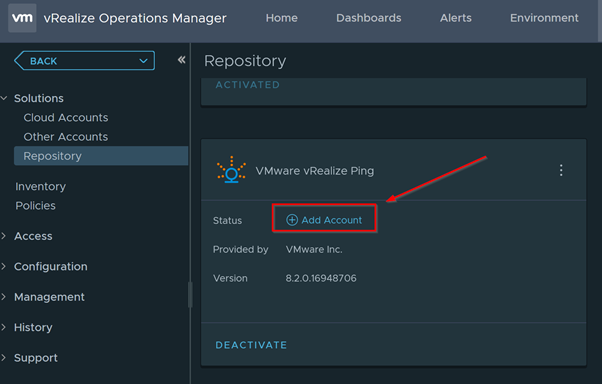
First you need to install the adapter. Go to Administration > Repository > Vmware vRealize Ping > Activate
How to Ping a single DNS Server or IP Address
Once activated you can configure the Ping Adapter. Click on Add Account
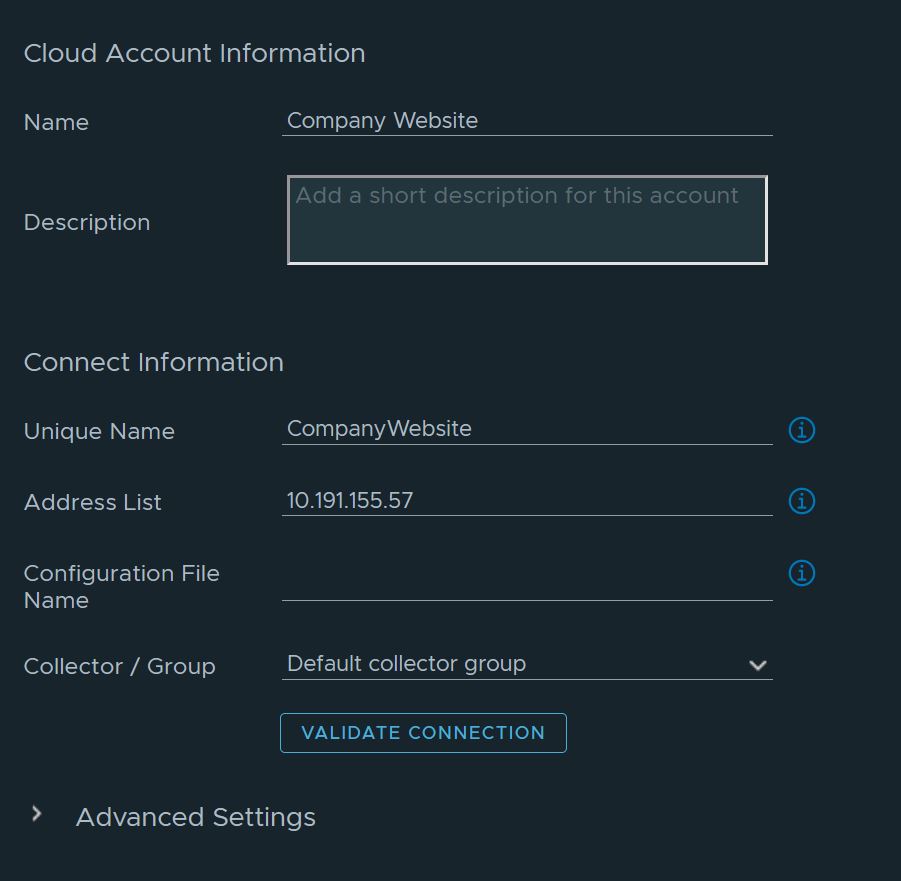
In this example we will ping a simple external server by IP address. You can also use DNS as needed. Just type in the name and the address you want to ping.
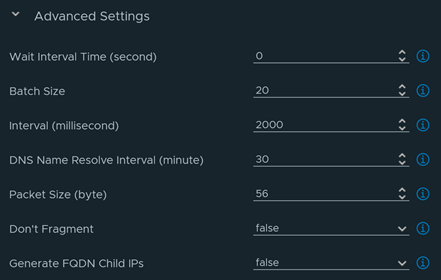
Expanding Advance Settings will give you more options. Just click on the information icon to see what it does. Click on Validate Connection and then click on Add to save it once you are done.
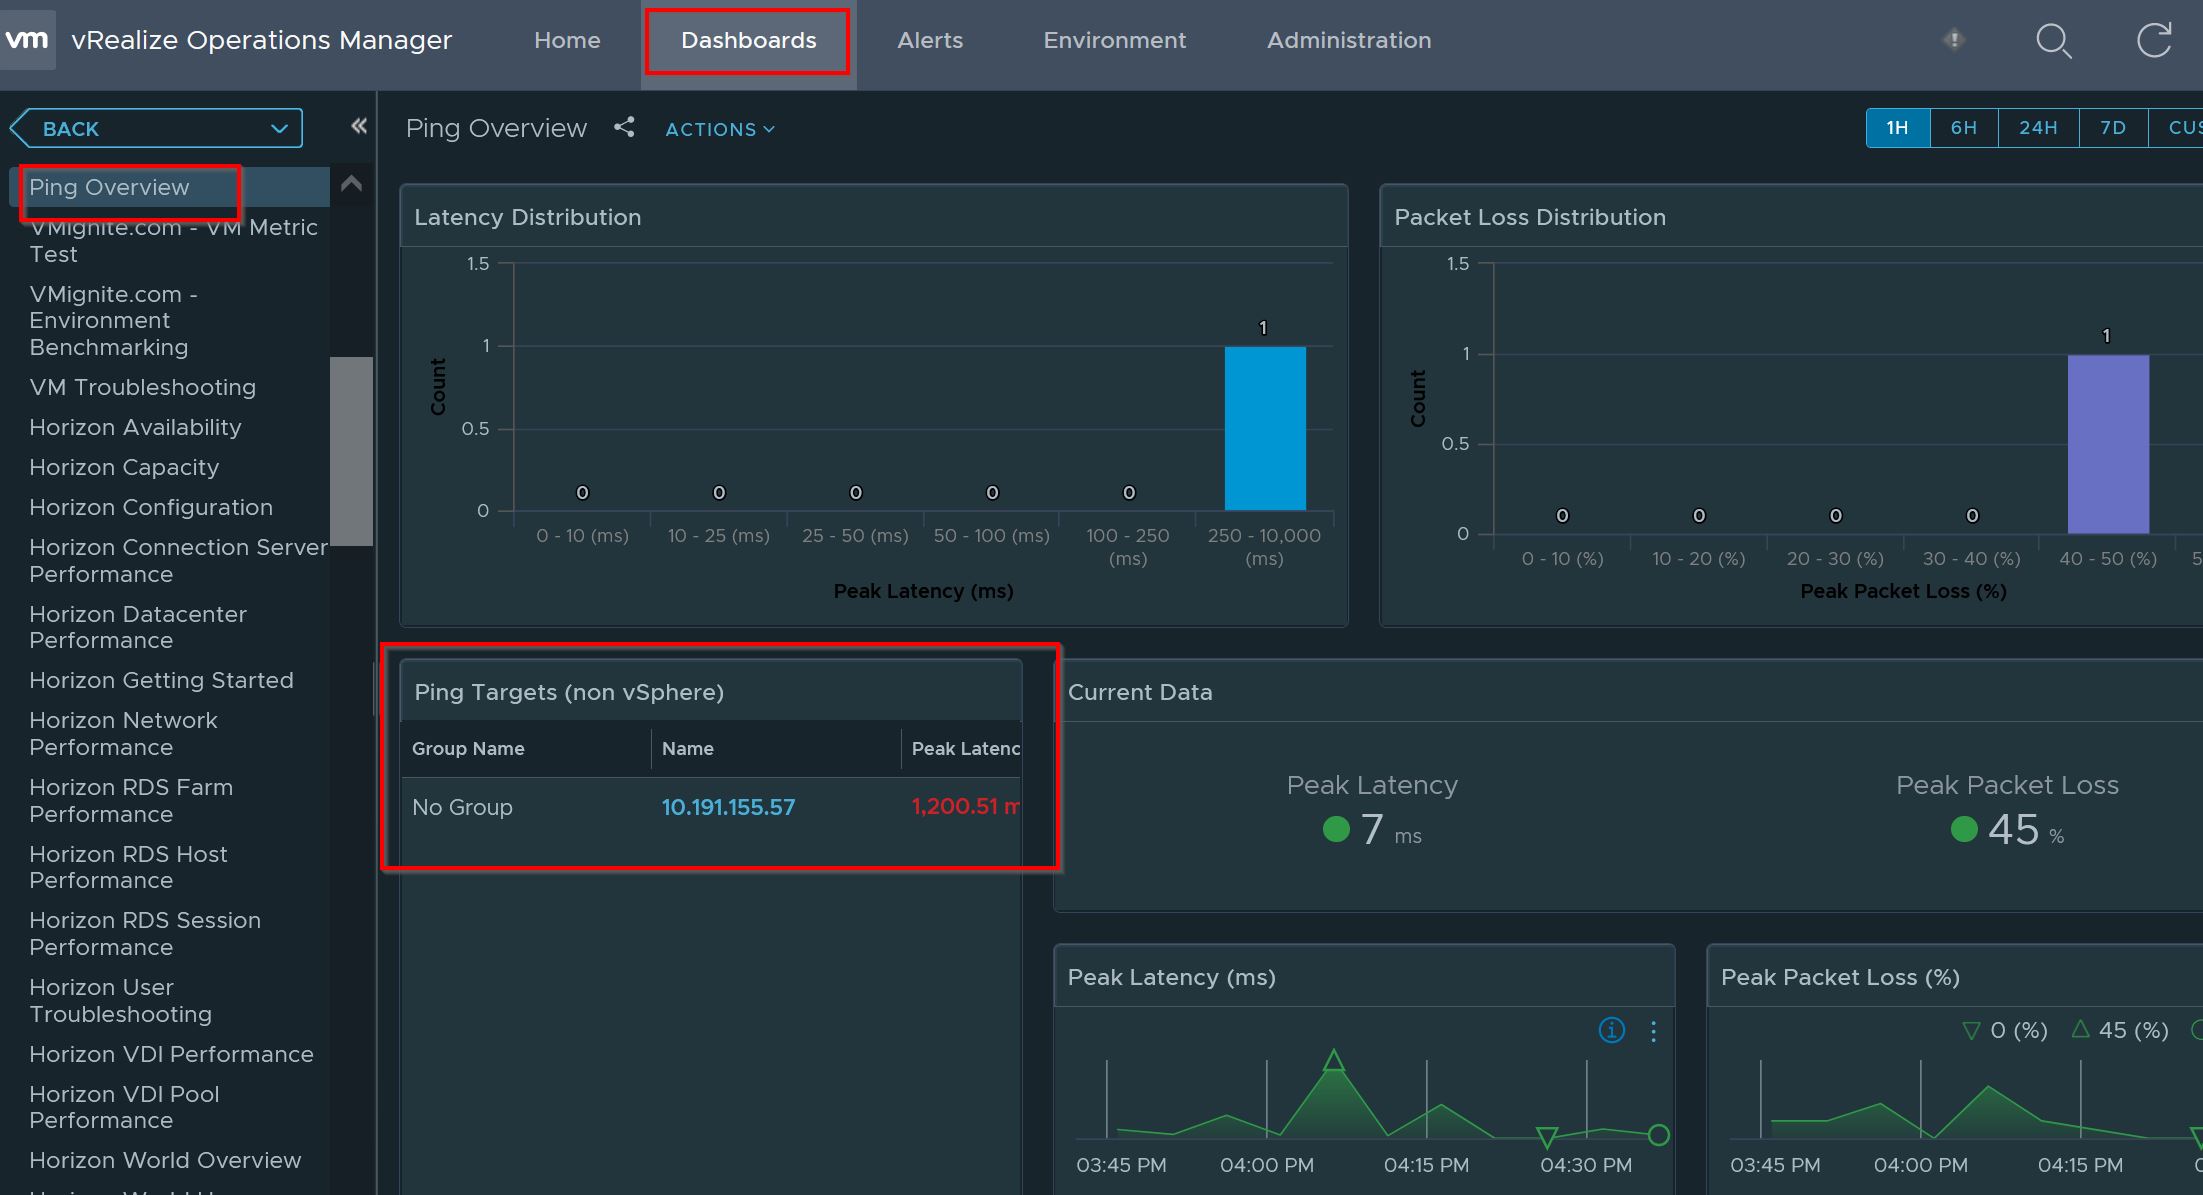
Give it about 15 minutes. Now go to Dashboards > Ping Overview Dashboard. You should see your server listed in the dashboard.
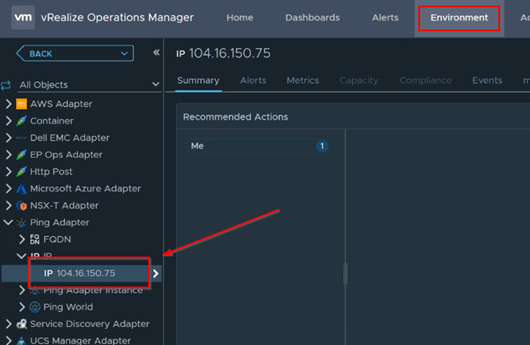
It is also ready to be added to an alert or dashboard as needed. As you can see if you go to Environment > Ping Adapter > IP you will see your server listed there. You will get some valuable metrics under the metrics section.
How to Ping a full subnet, URL, or even a range of IP Addresses
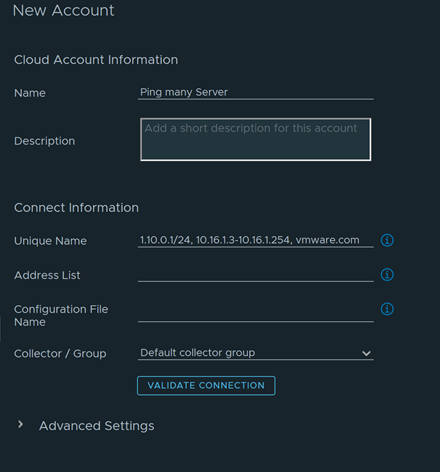
Adding multiple object just requires adding more to what you already have. Notice how I use commas to separate the entries. In the following example:
- 1.10.0.1/24 will ping the entire subnet
- 10.16.1.3-10.16.1.254 will ping that exact range of IP addresses
- Vmware.com will ping the URL
How to ping an existing Host or VM
Search for your Host or VM and then select it. This will bring you to the summary page of that object. Click on Enable Ping Monitoring in the Ping Statistics bow. In the example below, we are monitoring a single ESXi Host.
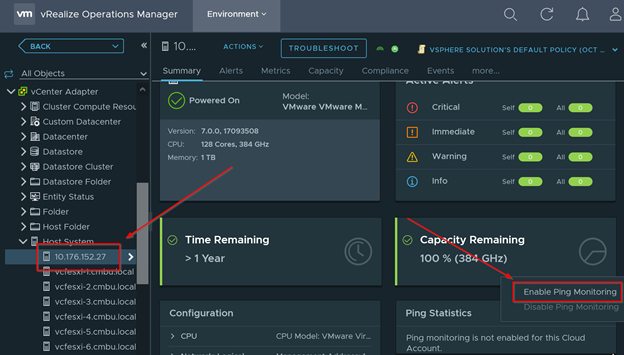
Give it about a good 30 minutes and refresh the object. You should now see Ping statistics for that ESXi Host in the summary page

You will also have a new set of metrics for the ESXi Host as well. Look for Ping Statistics under Metrics for that ESXi Host
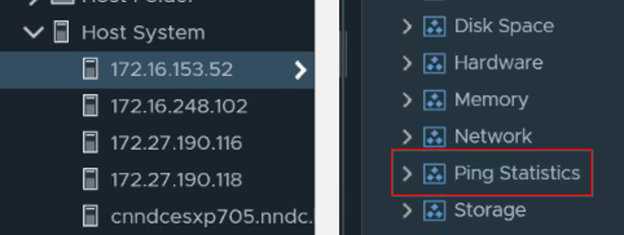
Using Metric Config File to monitor servers
Another alternative way to monitor many servers is to use a metric config file (XML File). Using a Metric config file is easier to manage if you have over a dozen or even hundreds of servers you would like to monitor. Since it is file based, it is easier to copy and manage. Also, it can get backed up using the vROPS content management backup feature.
Go to Administration > Metric Configurations > SolutionConfig. Take a look at the ping_adapter_config to get a good baseline on how to configure the ping pack. You can choose to modify or add a new one. Whichever way you choose just remember the name of the config file. We will need it in the next steps.
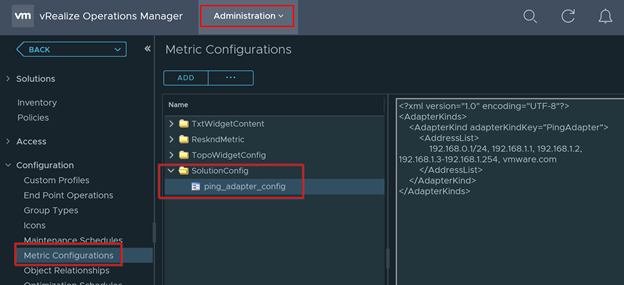
Once configured, go back to Administration > Repository > Vmware vRealize Ping adapter. Click on Add Account
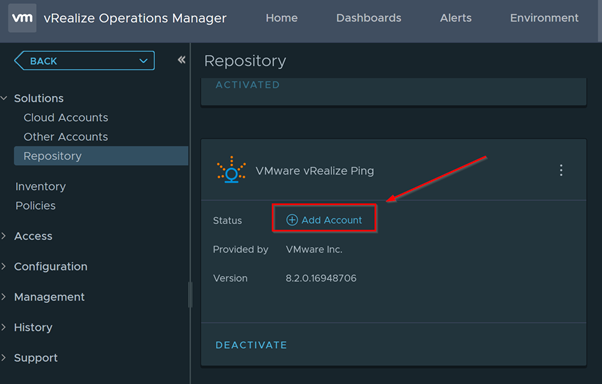
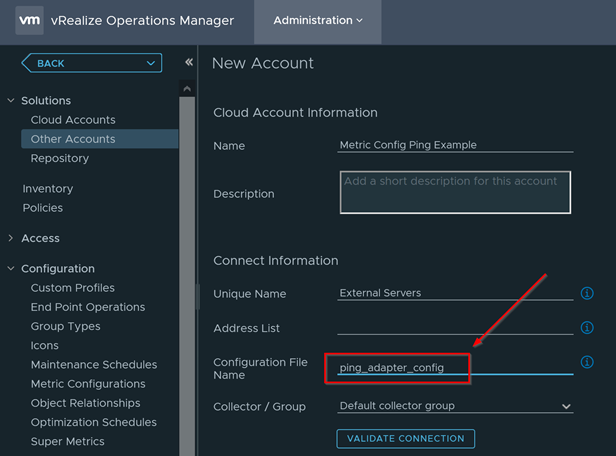
Fill in the name and unique name section but this time we will leave the Address List empty. Instead we will enter in the name of the config file we would want to use. Click on Add to save
